
Thursday 4/7/21: Understanding Depth of Field + Photo Experiment
Today’s Agenda:
- PPT Slides to revisit Depth of Field
- Depth of Field Activity #1
- Voting on Product Photography-POSTPONED to Friday (tomorrow)
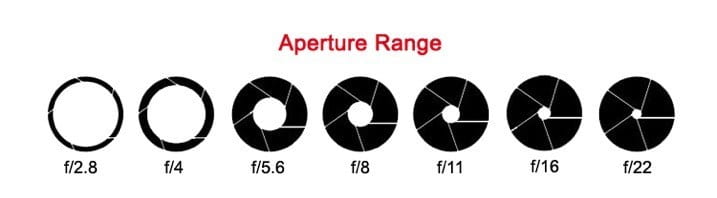
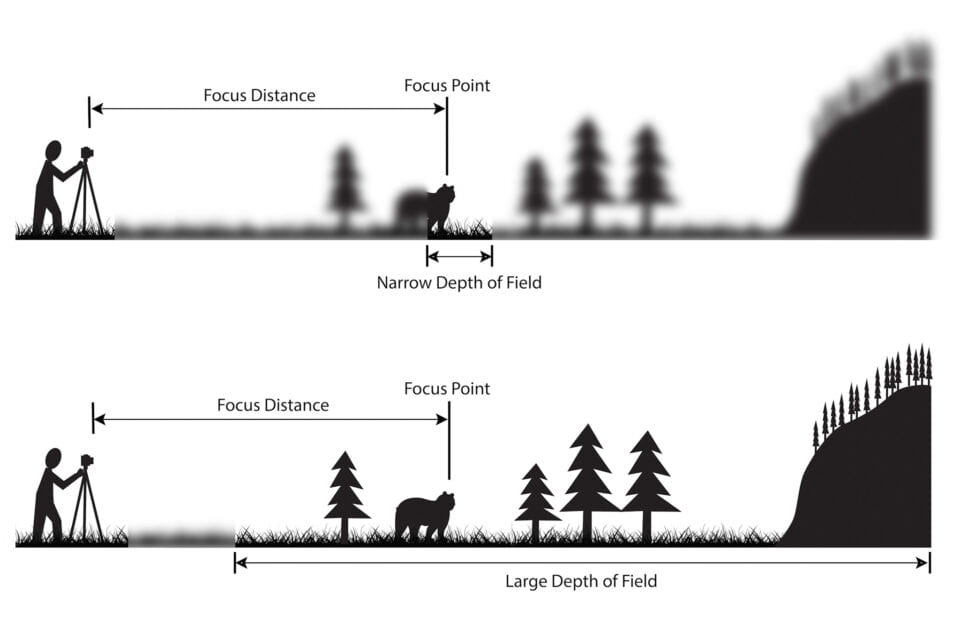
Depth of Field
The following PPT slides reviews Depth of Field with examples and videos. Also includes instructions on how to achieve various depth of field with a smartphone, free app, a point-and-shoot camera, and with a DSLR camera. It will be necessary to know how to achieve various depth of field for the first photo activity.
Visual Resources:


Depth of Field Photo Activity #1

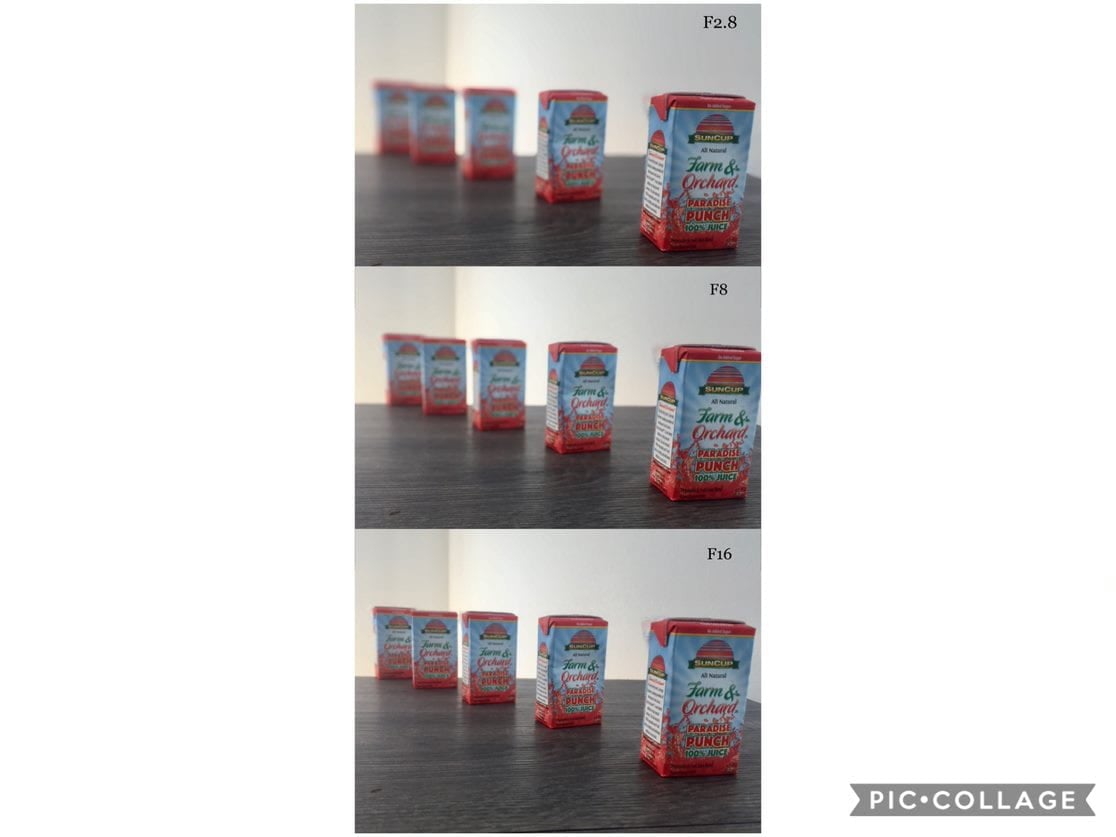
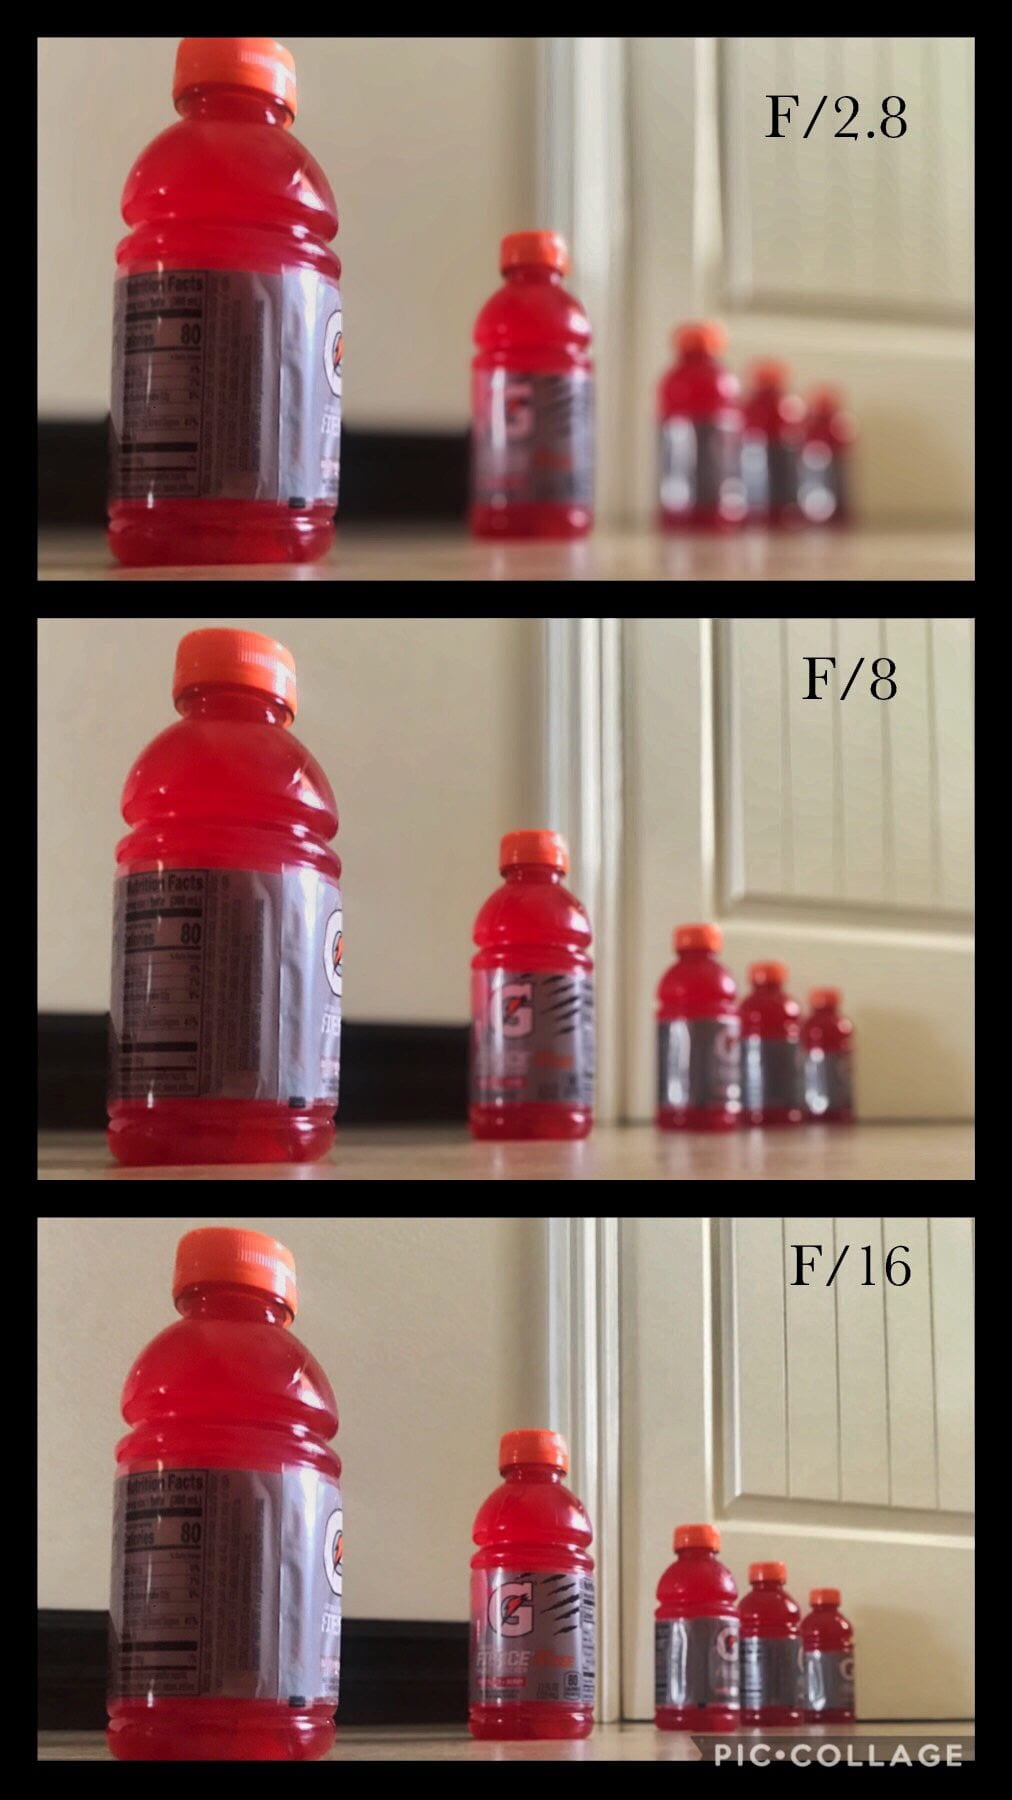
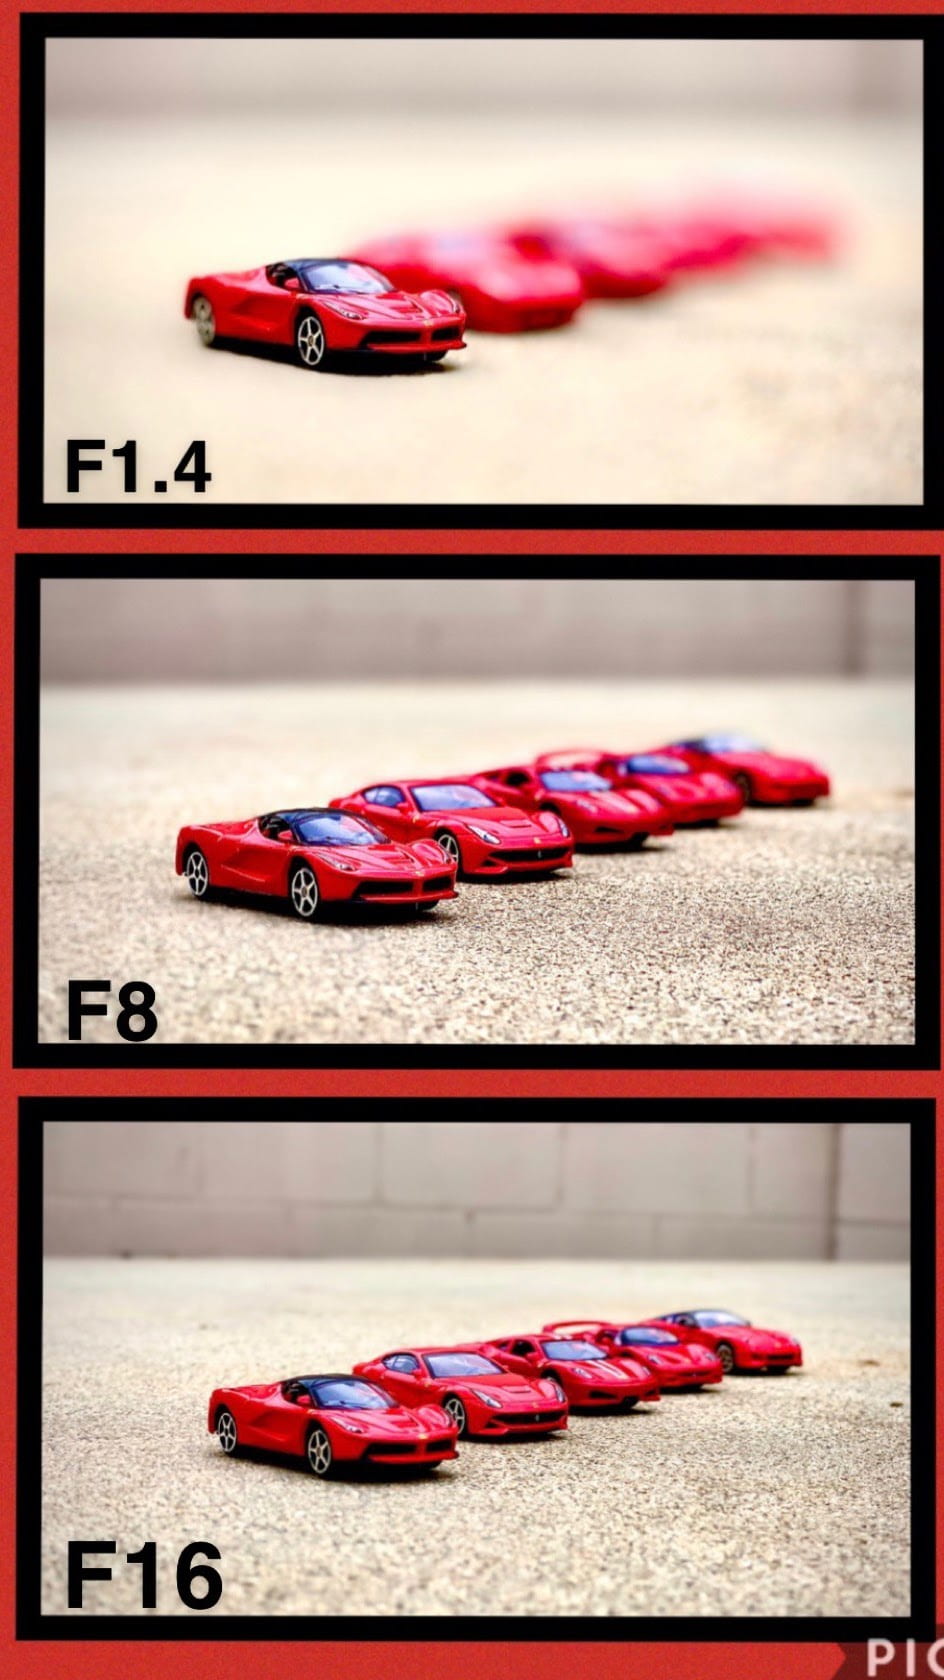
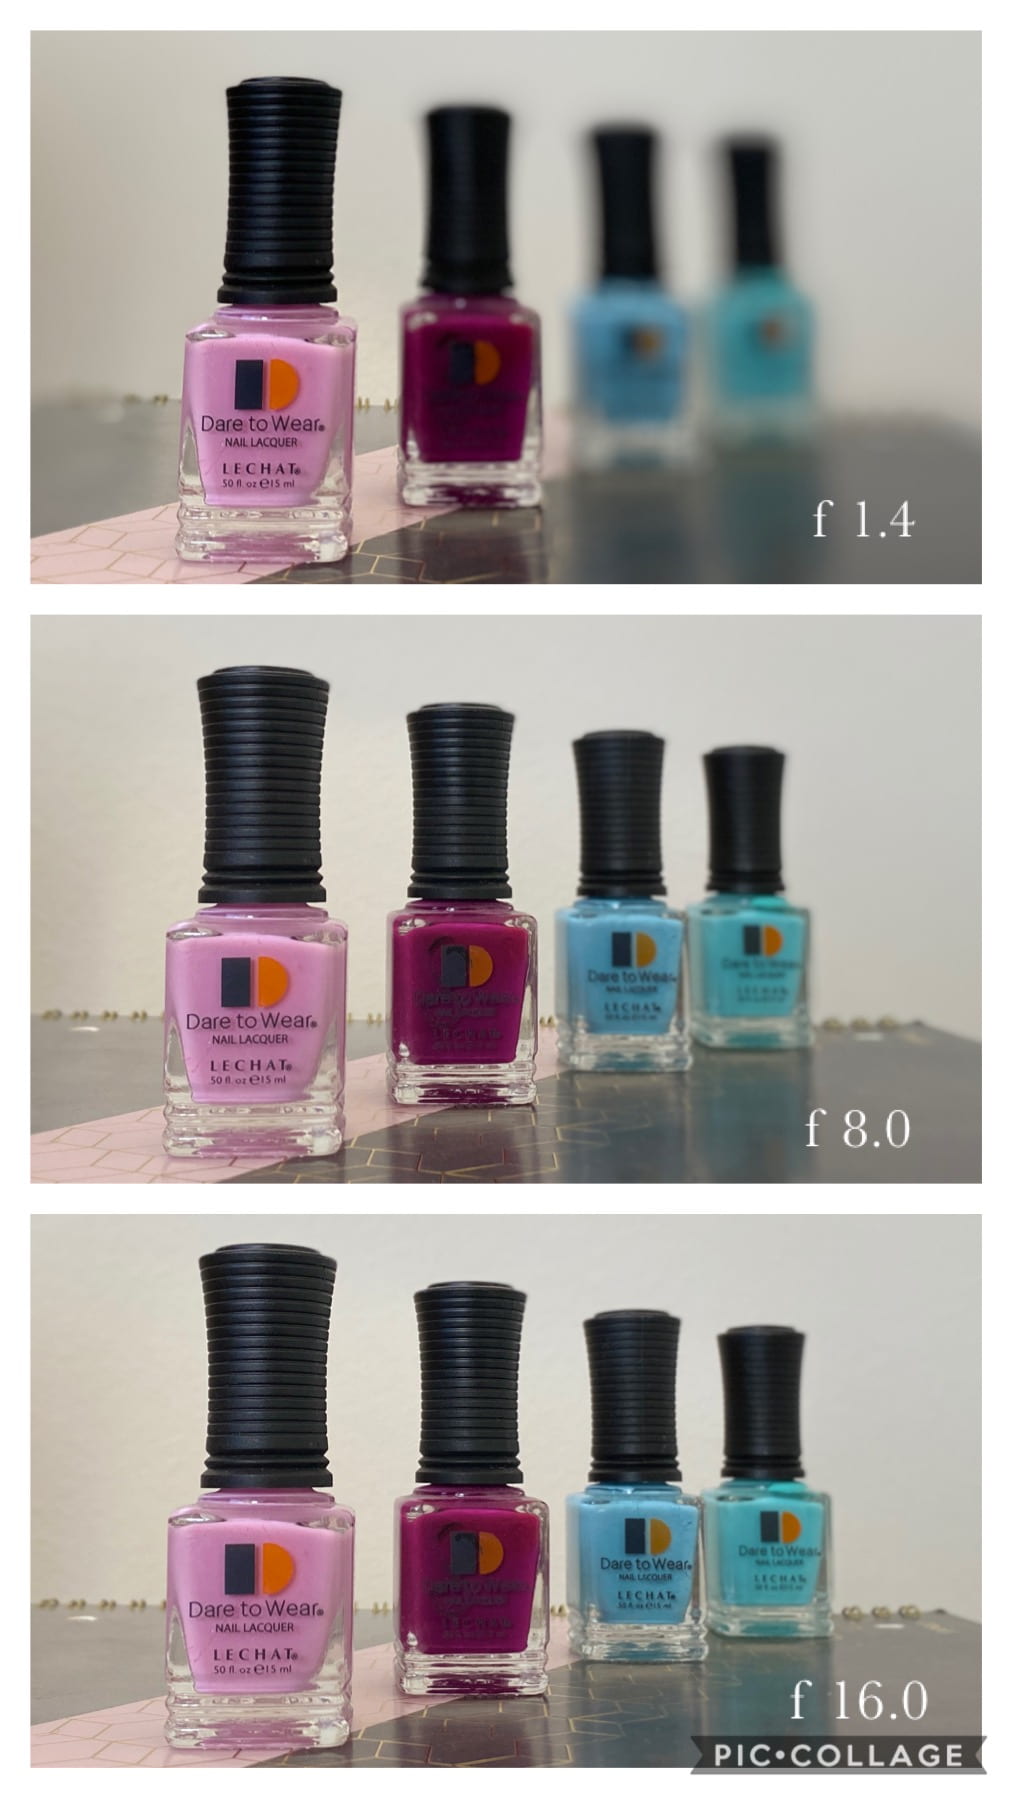
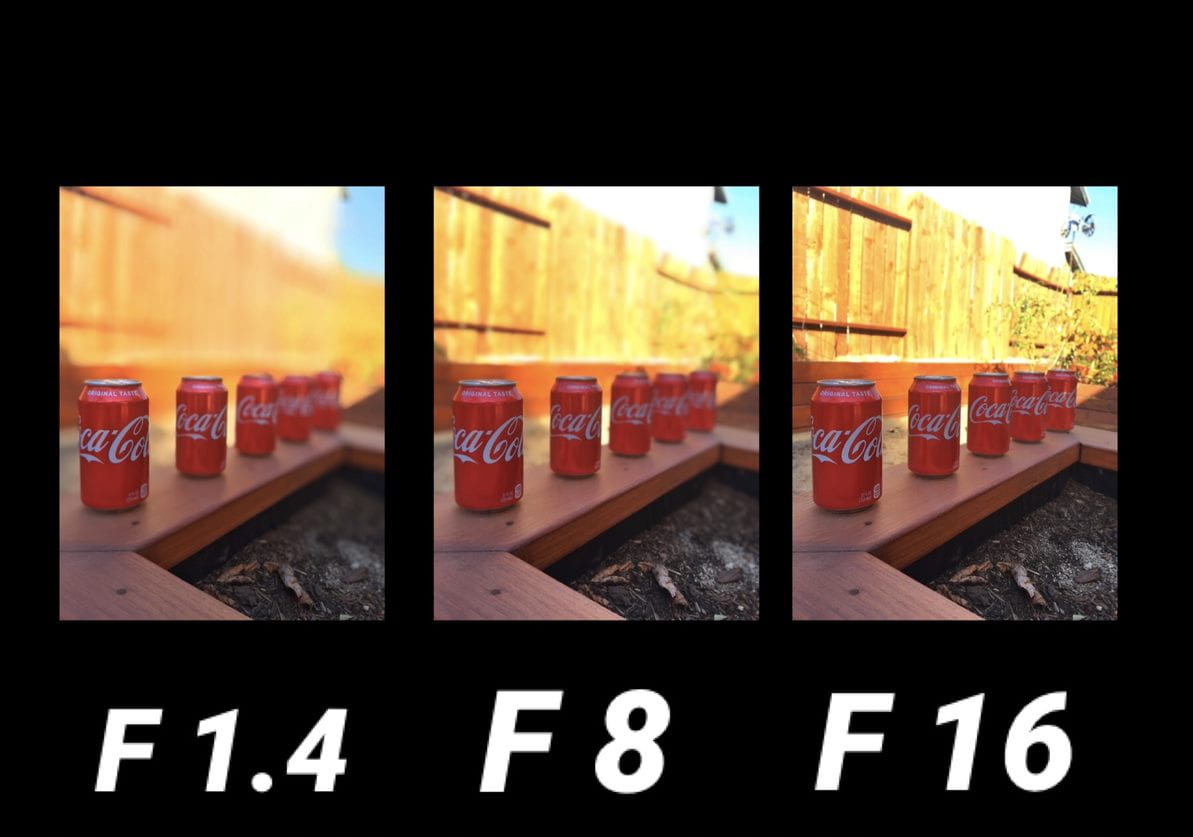

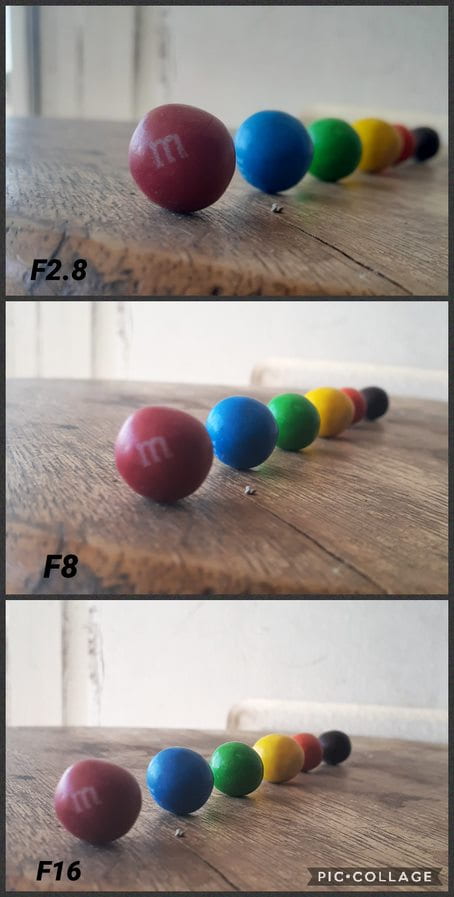
(TAKE NOTE THAT YOU HAVE DIFFERENT APERTURE NUMBERS ASSIGNED THAN THESE EXAMPLES!)
- Collect 5+ identical or similar objects from around your house and set them up on a flat surface like a table or the floor.
- Arrange them in a diagonal row so that some objects are close to the camera, some are slightly farther away, and some are very far away from the camera (see examples above).
- The deeper the space you set up, the easier you will see the effects on Depth of Field. Don’t set up items against a wall, leave open space behind the last item.
- Set your smartphone to Portrait Mode or use the Focos App. The PPT slides provided info how to change aperture f-stops using different devices and apps.
- Take 3 photos of your objects at f 1.4 (or lowest), about f 5-7, and f 16 aperture settings. Keep your camera in the same spot for each photo so the only difference between each shot is the depth of field captured. In other words, you’re trying to capture:
- 1 Shallow Depth of Field photo (closer object in focus) with f1.4
- 1 Medium Depth of Field photo (a few of the closest objects in focus) with about f5-7
- 1 Wide Depth of Field Photo (everything in focus) with f16
- Edit your photos a bit to increase the brightness, contrast, and saturation as needed. Use your mobile phone or the free Snapseed app to edit.
-
Put all three edited photos in a collage using PicCollage and correctly label each shot with the aperture you used. Do not use a grid template if it cuts off part of your photos.
- Turn in on Teams: “Depth of Field Photo Activity#1”.