Posted in Photo 1 Assignments

Tuesday 3/30/21: Intro to Product Photography

Today’s Agenda:

  • Review editing activity from yesterday
  • Brushes in Stack Edits
  • Product Photography Notes + Activity

Brushes in Stack Edits

Click here for a quick video!


Product Photography

Click here for Product Photography PowerPoint!

Write down 5-10 tips you learned from the 3 videos below into today’s notes:

1.

Click here for the first video!

2.

3.


Activity:

  1. Search around on the Internet, Instagram, or Pinterest to look for product photography of products and brands that you love.
  2. Choose 3-5 photos that you love and place them on a Word document.
  3. Below each photo explain what you love about the photo and the product.
  4. Turn into Teams today!
Posted in Photo 1 Assignments

Monday 3/29/21: Welcome Back to Term 4 (second semester)

Today’s Agenda:

  • Sign up for Remind if you haven’t already!
  • Review Editing on Snapseed
  • Using Brushes with Snapseed
  • Editing Activity


Editing with Snapseed

Editing is a powerful and essential step in photography. Remember, the word “photography” essentially means “drawing with light”. Editing allows you to keep “drawing” onto the captured image to create the results you desire.

We’re going to watch a couple of videos that demonstrate how others edit with Snapseed to take photos from okay to amazing!  The first video will feature the following:

  • Tune Image
  • Details
  • Curves
  • HDR
  • Grainy Film
  • White Balance
  • Brush

This next video will show a more in-depth use of the Brush tool.  This is a game-changer, y’all!


Editing Activity

Part 1:

Use the image below to edit on Snapseed.  Use ALL the Tools listed from the video above. (Use your phone to access this website or Files on Teams to download to your camera roll. I will also send through Remind!)

Place your before & after on a PicCollage and submit to Teams assignment: Editing Activity.

Part 2:

Now choose one of your own photos (from Spring Break or from last term) to edit according to your liking then use at least one Brush tool as well.

Place your before & after on a PicCollage and upload to the Class Gallery Wall! Include your name and explain what Brush tools you used and where.

(Class Gallery Wall links are on Teams)

Posted in Photo 1 Assignments

Monday 3/15/21: Peer Critique

Today’s Agenda:

  • Peer Critique-due today
  • Study for Semester Final
  • Work on Missing Assignments

PEER CRITIQUE

Click on the “Photo 1 Gallery” tab on this blog and take time to look through the photos by clicking on them to view in full size. Choose a photo that you really love or admire.  It doesn’t have to be a Mix and Match photo.

Copy the photo and paste onto a Word document, then answer the following questions about it:

  1. What is the main subject/focus of the photo?
  2. What camera angle do you think was used and how can you tell?
  3. What rules of composition do you see being used and explain how?
  4. What moods, feelings, or ideas are expressed with this photo? Explain.
  5. What do you love about the photo?  Is there anything that could have been improved or done differently for more impact?

Turn into the Peer Critique assignment in Teams today!


Photo projects worth completing if you’re grade is suffering:

  • Double Exposure
  • Mix and Match
  • Capturing Life Photos
  • Rule of Thirds Postcard Photos
  • Photograms
  • Flat Lay Photography
Posted in Photo 1 Assignments

Thursday 3/11/21: Update Portfolios + Composition Quiz

Today’s Agenda:

  • Update YOUR Student Portfolios
  • Upload your BEST Mix and Match photo to Class Gallery Wall
  • Take Rules of Composition Open-Notebook Quiz
  • Complete Double Exposure Photos

1. Update your personal student portfolio with the following projects (upload individual photos, not collages). Don’t forget to title the photo and explain the project.

  • best rule of thirds photo/s
  • your best fill the frame photo/s
  • your best framing device photo/s
  • your best mix and match photo/s

2. Then upload your best Mix and Match photo to the class gallery wall if you haven’t already!


In the General channel on Teams you will find a link to a Rules of Composition Quiz.  You can take this quiz during class if you’re finished with your double exposures.  If not, it is your homework to take it before tomorrow’s class! You may use your notes, rules of composition activity, and the PowerPoint from class.

Posted in Photo 1 Assignments

Tuesday 3/9/21: Double Exposure, Double the Fun!

Today’s Agenda:

  • Notebook Check
  • Double Exposure Project

Double Exposure Project

Create a total of TWO double exposure photographs. Turn them in as individual files on the Teams assignment: “Double Exposure” by Thursday 3/11/21. Include a paragraph to explain each double exposure composite.

*Reminder: make your portrait black and white with high contrast first! *

1.Use a portrait of yourself + a landscape photo to produce an aesthetically pleasing composite. The landscape photo should express something about you and it can be from an online source. Don’t settle for the first thing you make, spend time creating something that you believe looks good. Sometimes you have to try different photos or try rotating or enlarging the landscape photo. Watch this video to see how quickly you can swap out a photo and rotate/enlarge, etc…

2.Create a ANOTHER double exposure of your choice from the following menu (ONLY CHOOSE ONE):

  • Use a portrait of yourself plus another photo that YOU have taken to produce and aesthetically pleasing composite. (The second photo should not be a landscape).
  • Combine two portraits of yourself to produce an interesting composite.
  • Surrealism: combine two photos you have taken to create something weird, strange, or dream like.
  • Use a portrait of yourself plus a photo of an animal to produce an aesthetically pleasing composite (animal photo can be from online source). The animal should express something about you.
  • Combine two images to speak about a subject or issue that is important to you. (One photo must be taken by you).

Some inspiration (student produced and some from the Internet):


Posted in Photo 1 Assignments

Monday 3/8/21: Practicing Double Exposure Self-Portraits

Today’s Agenda:

  • Practicing Double Exposure Portraits with Snapseed
  • If you haven’t already: upload your best Mix and Match photo to class gallery wall

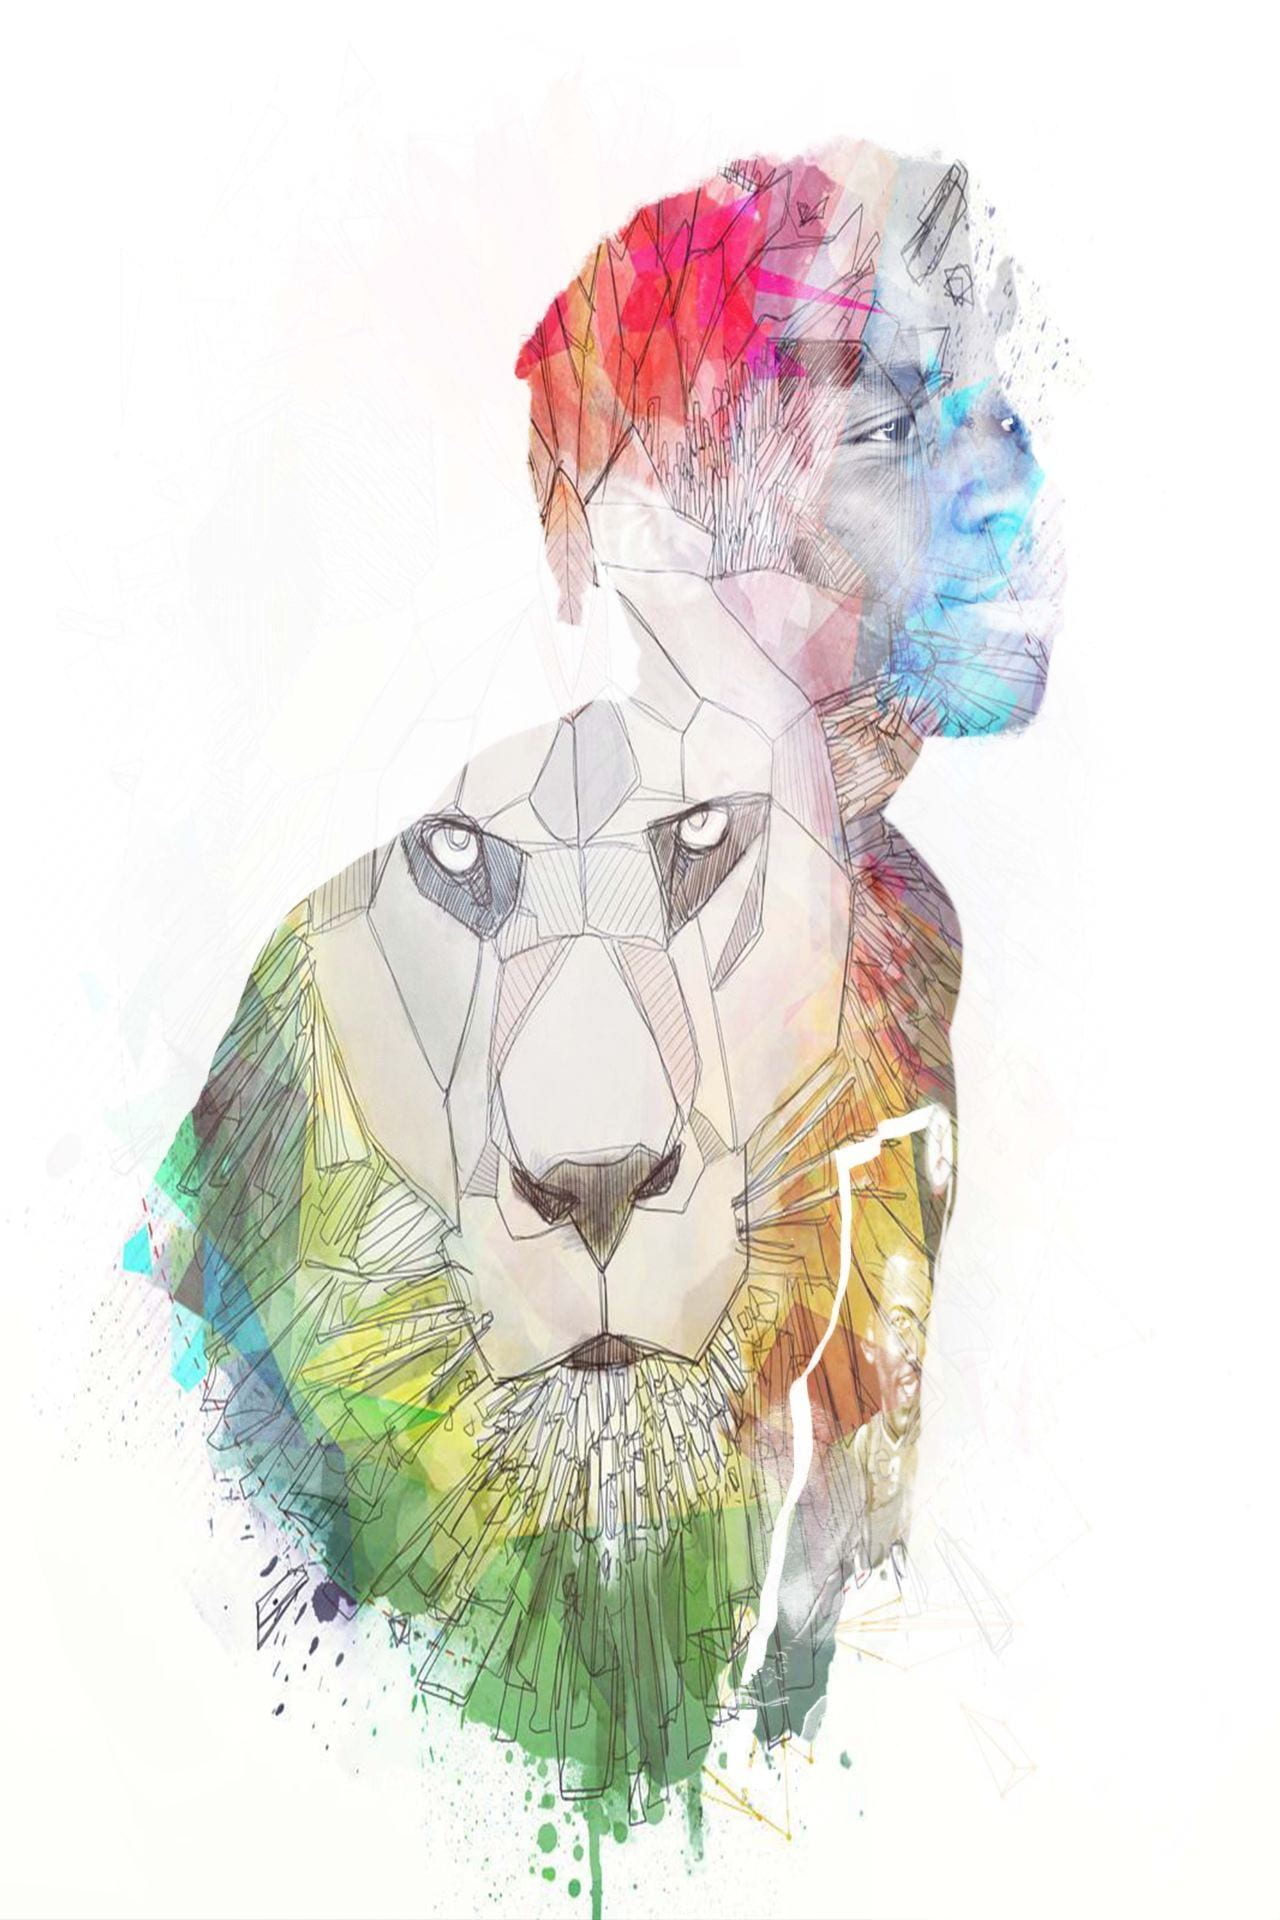
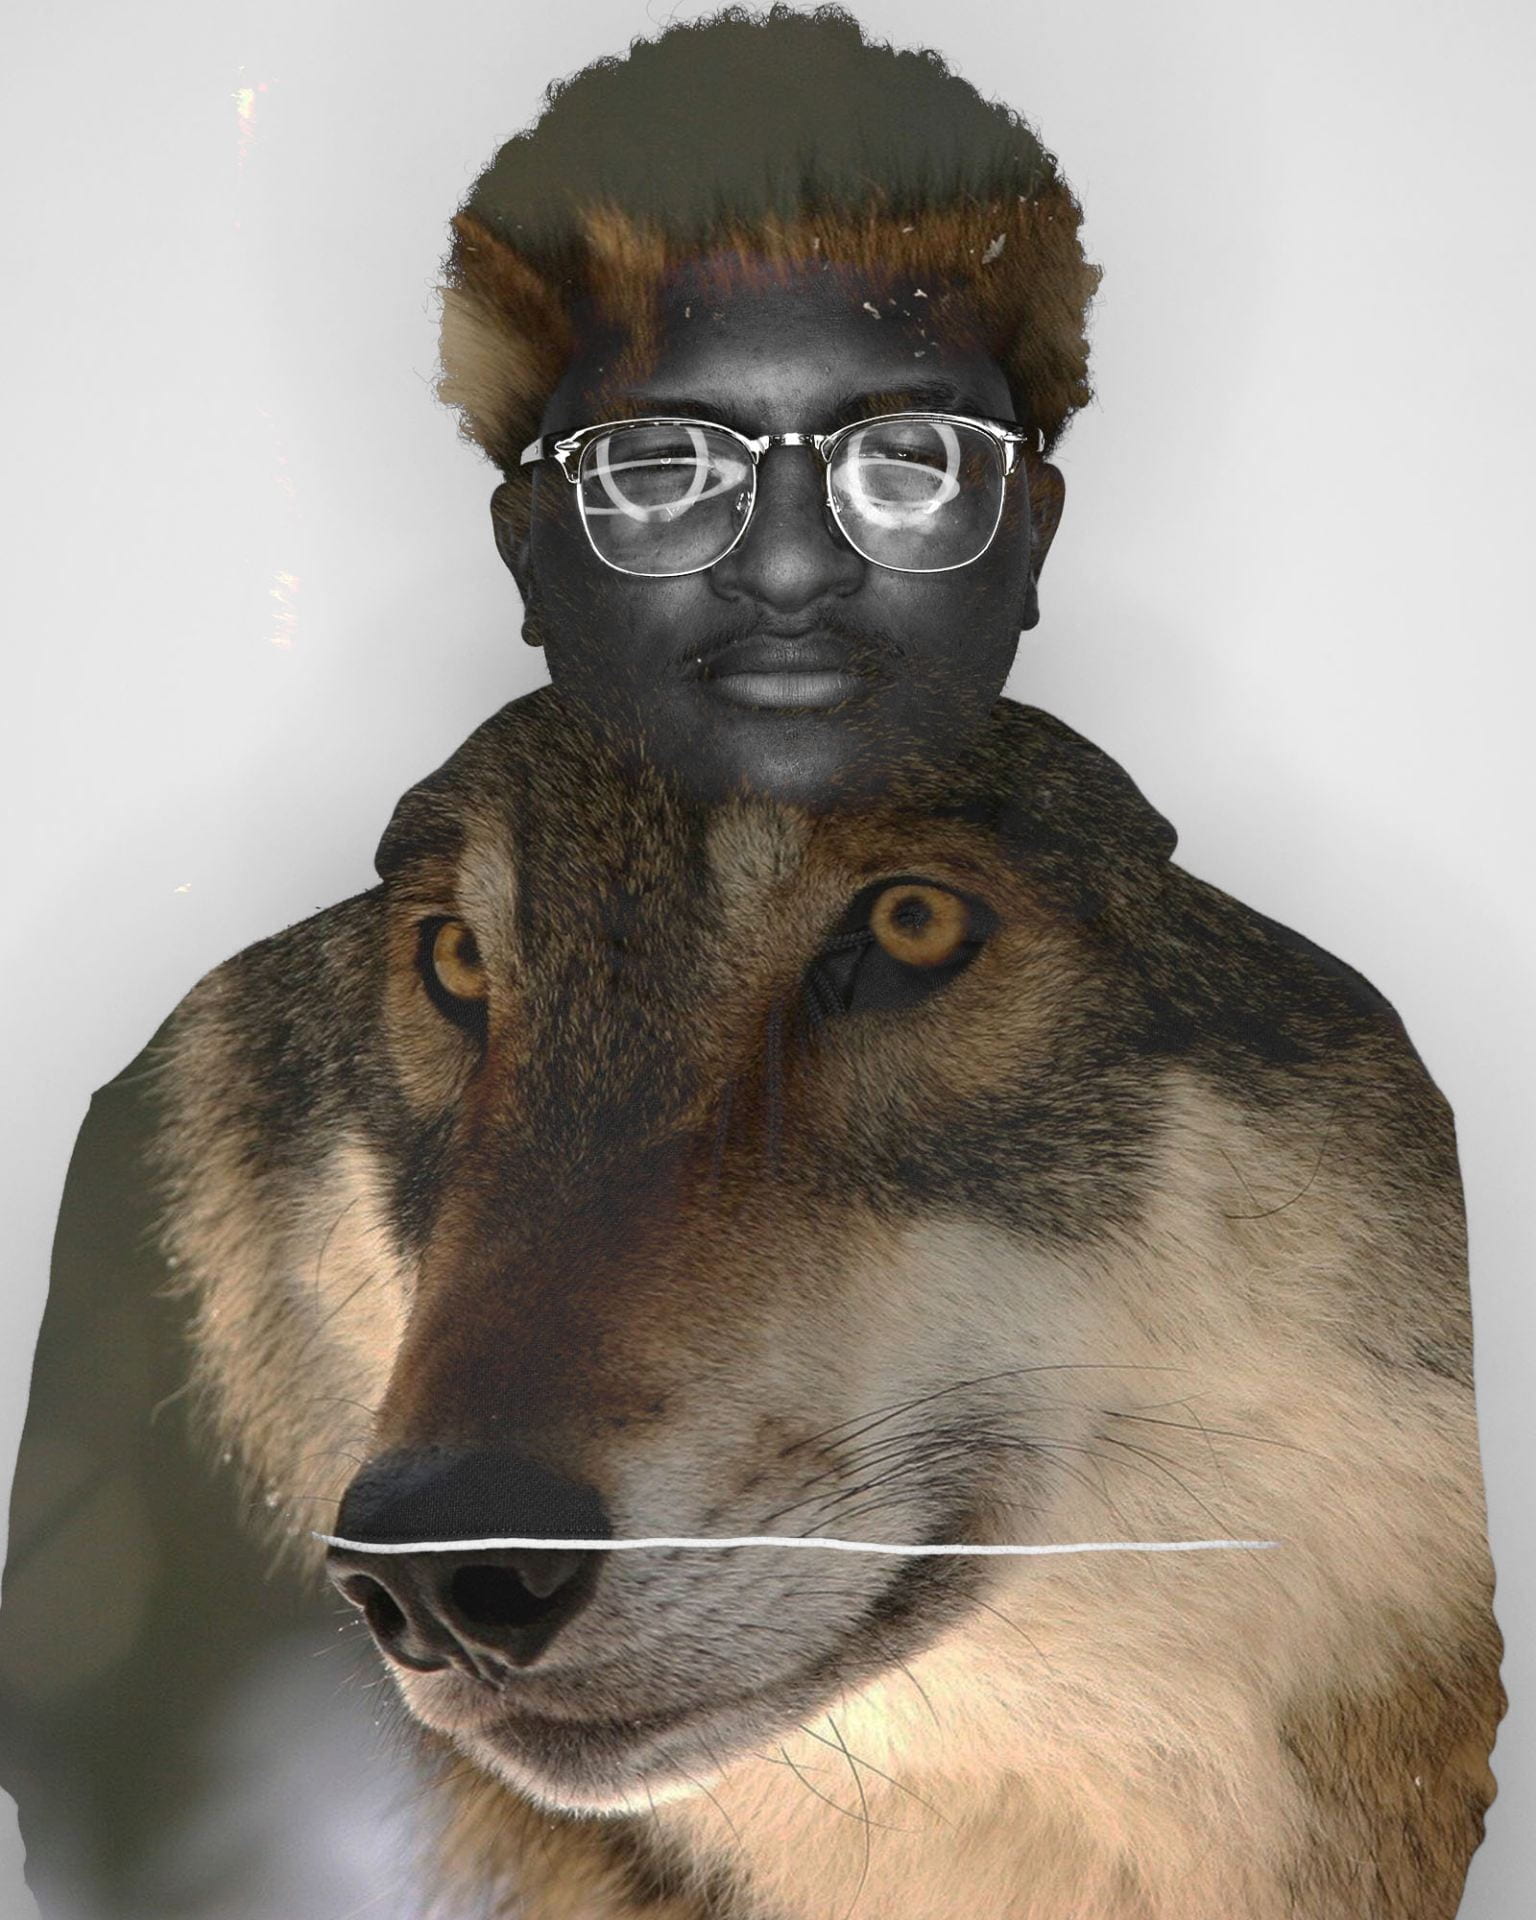
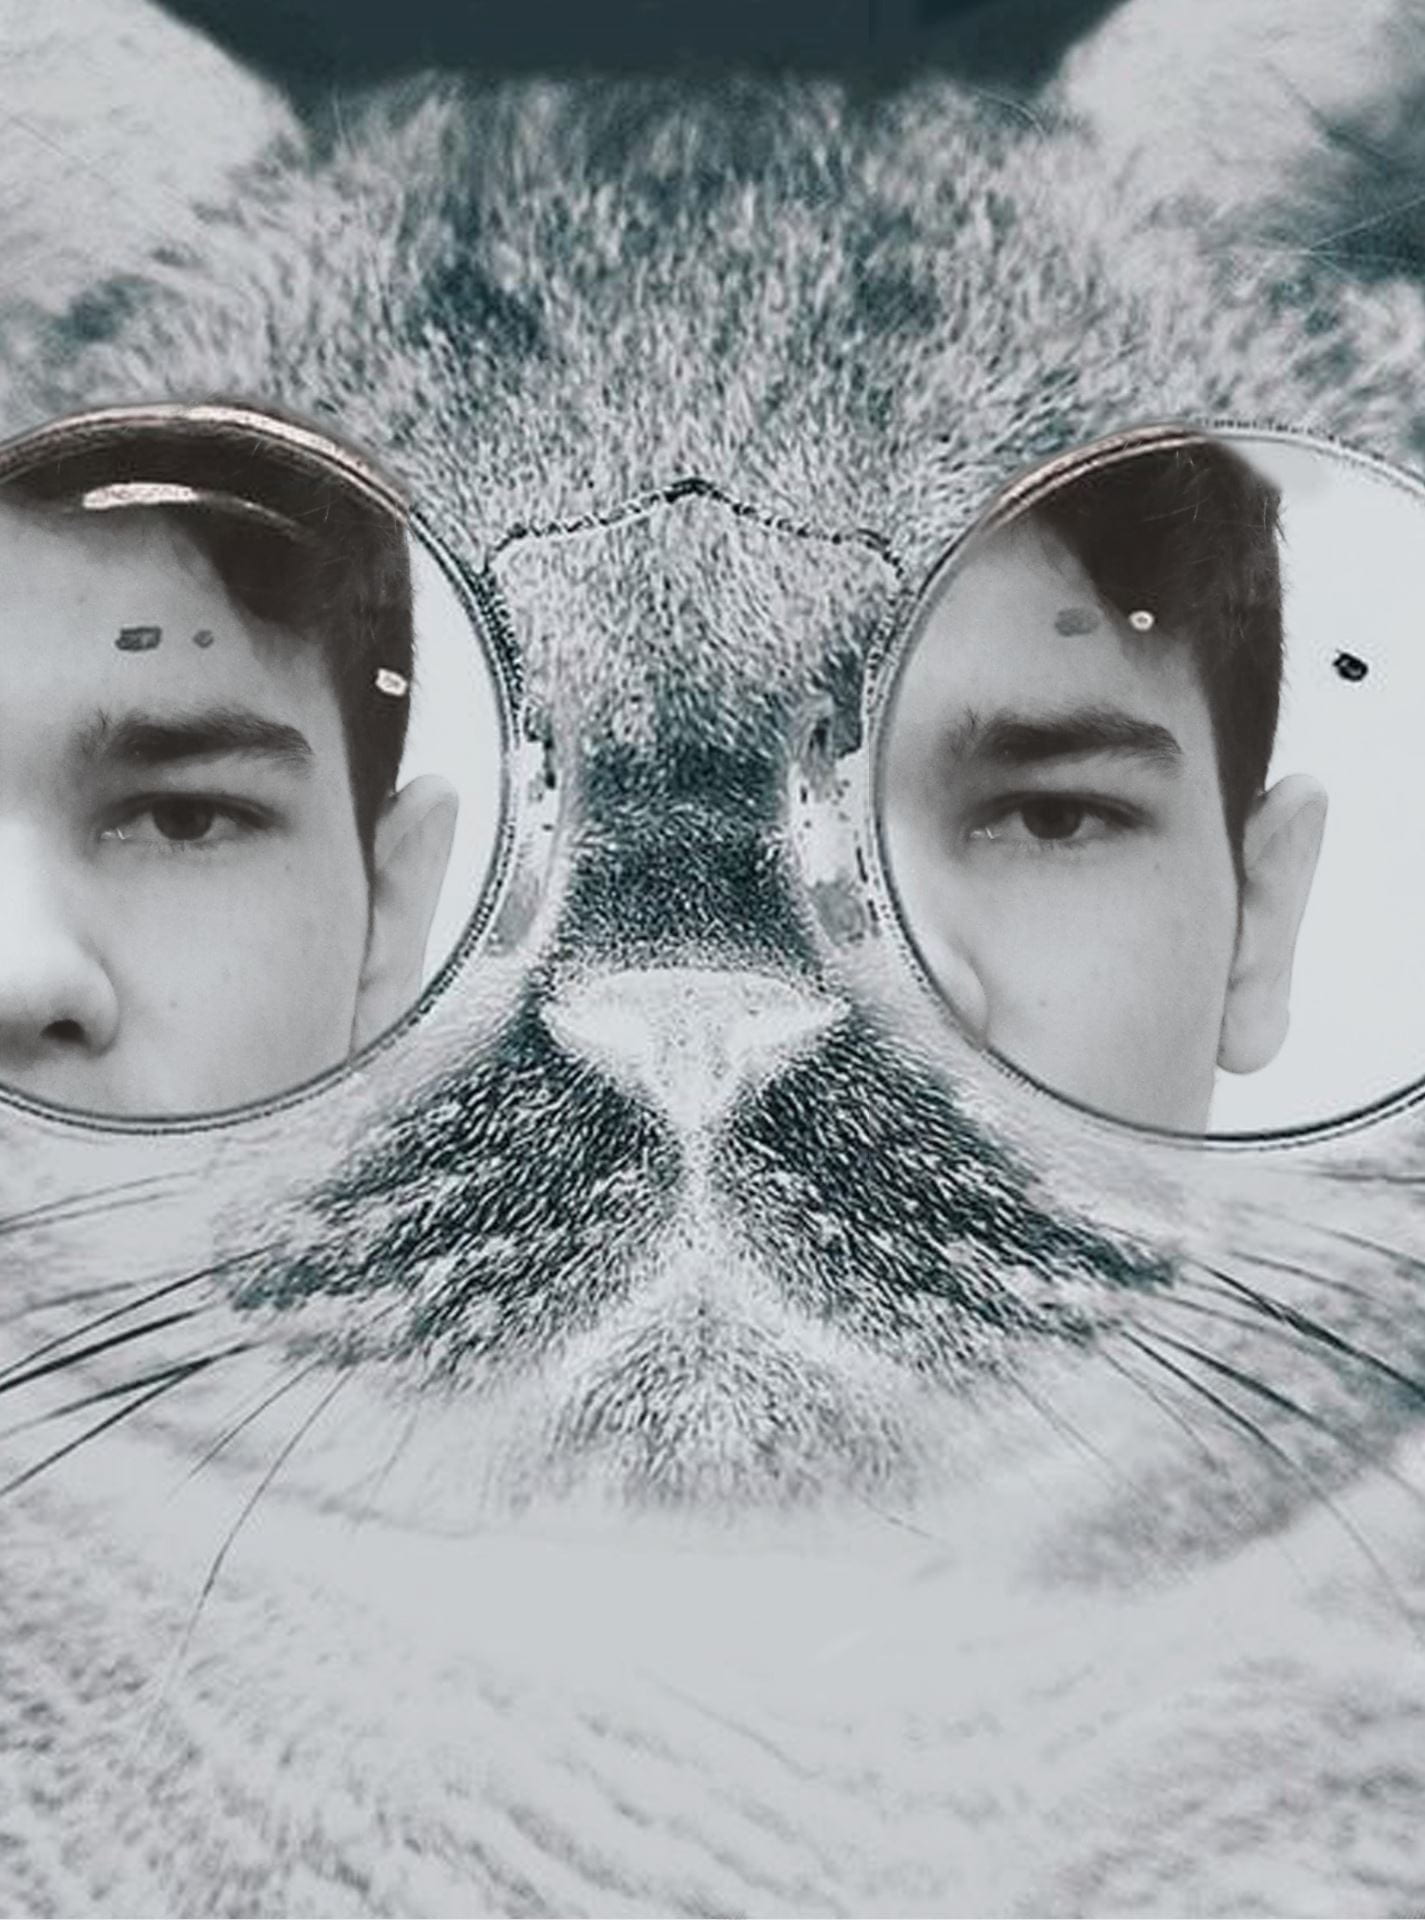
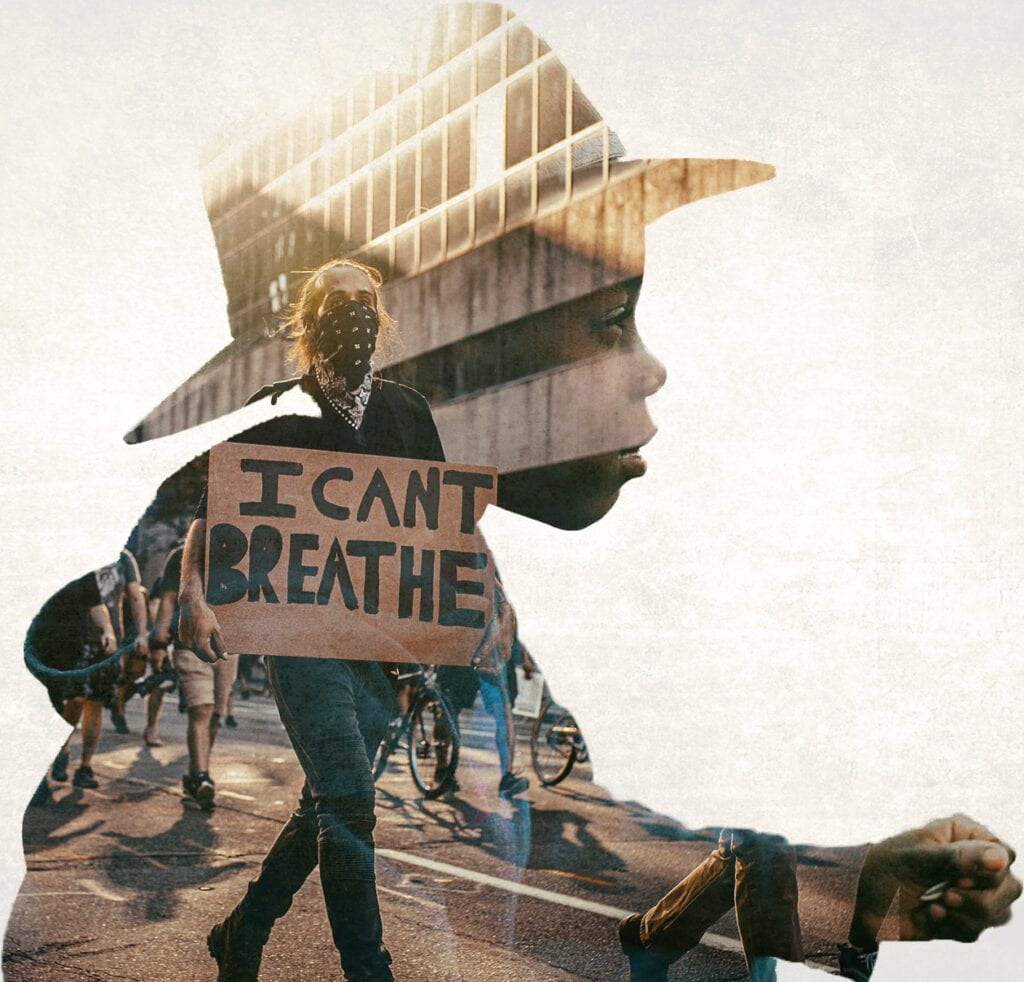
What is a “Double Exposure”?

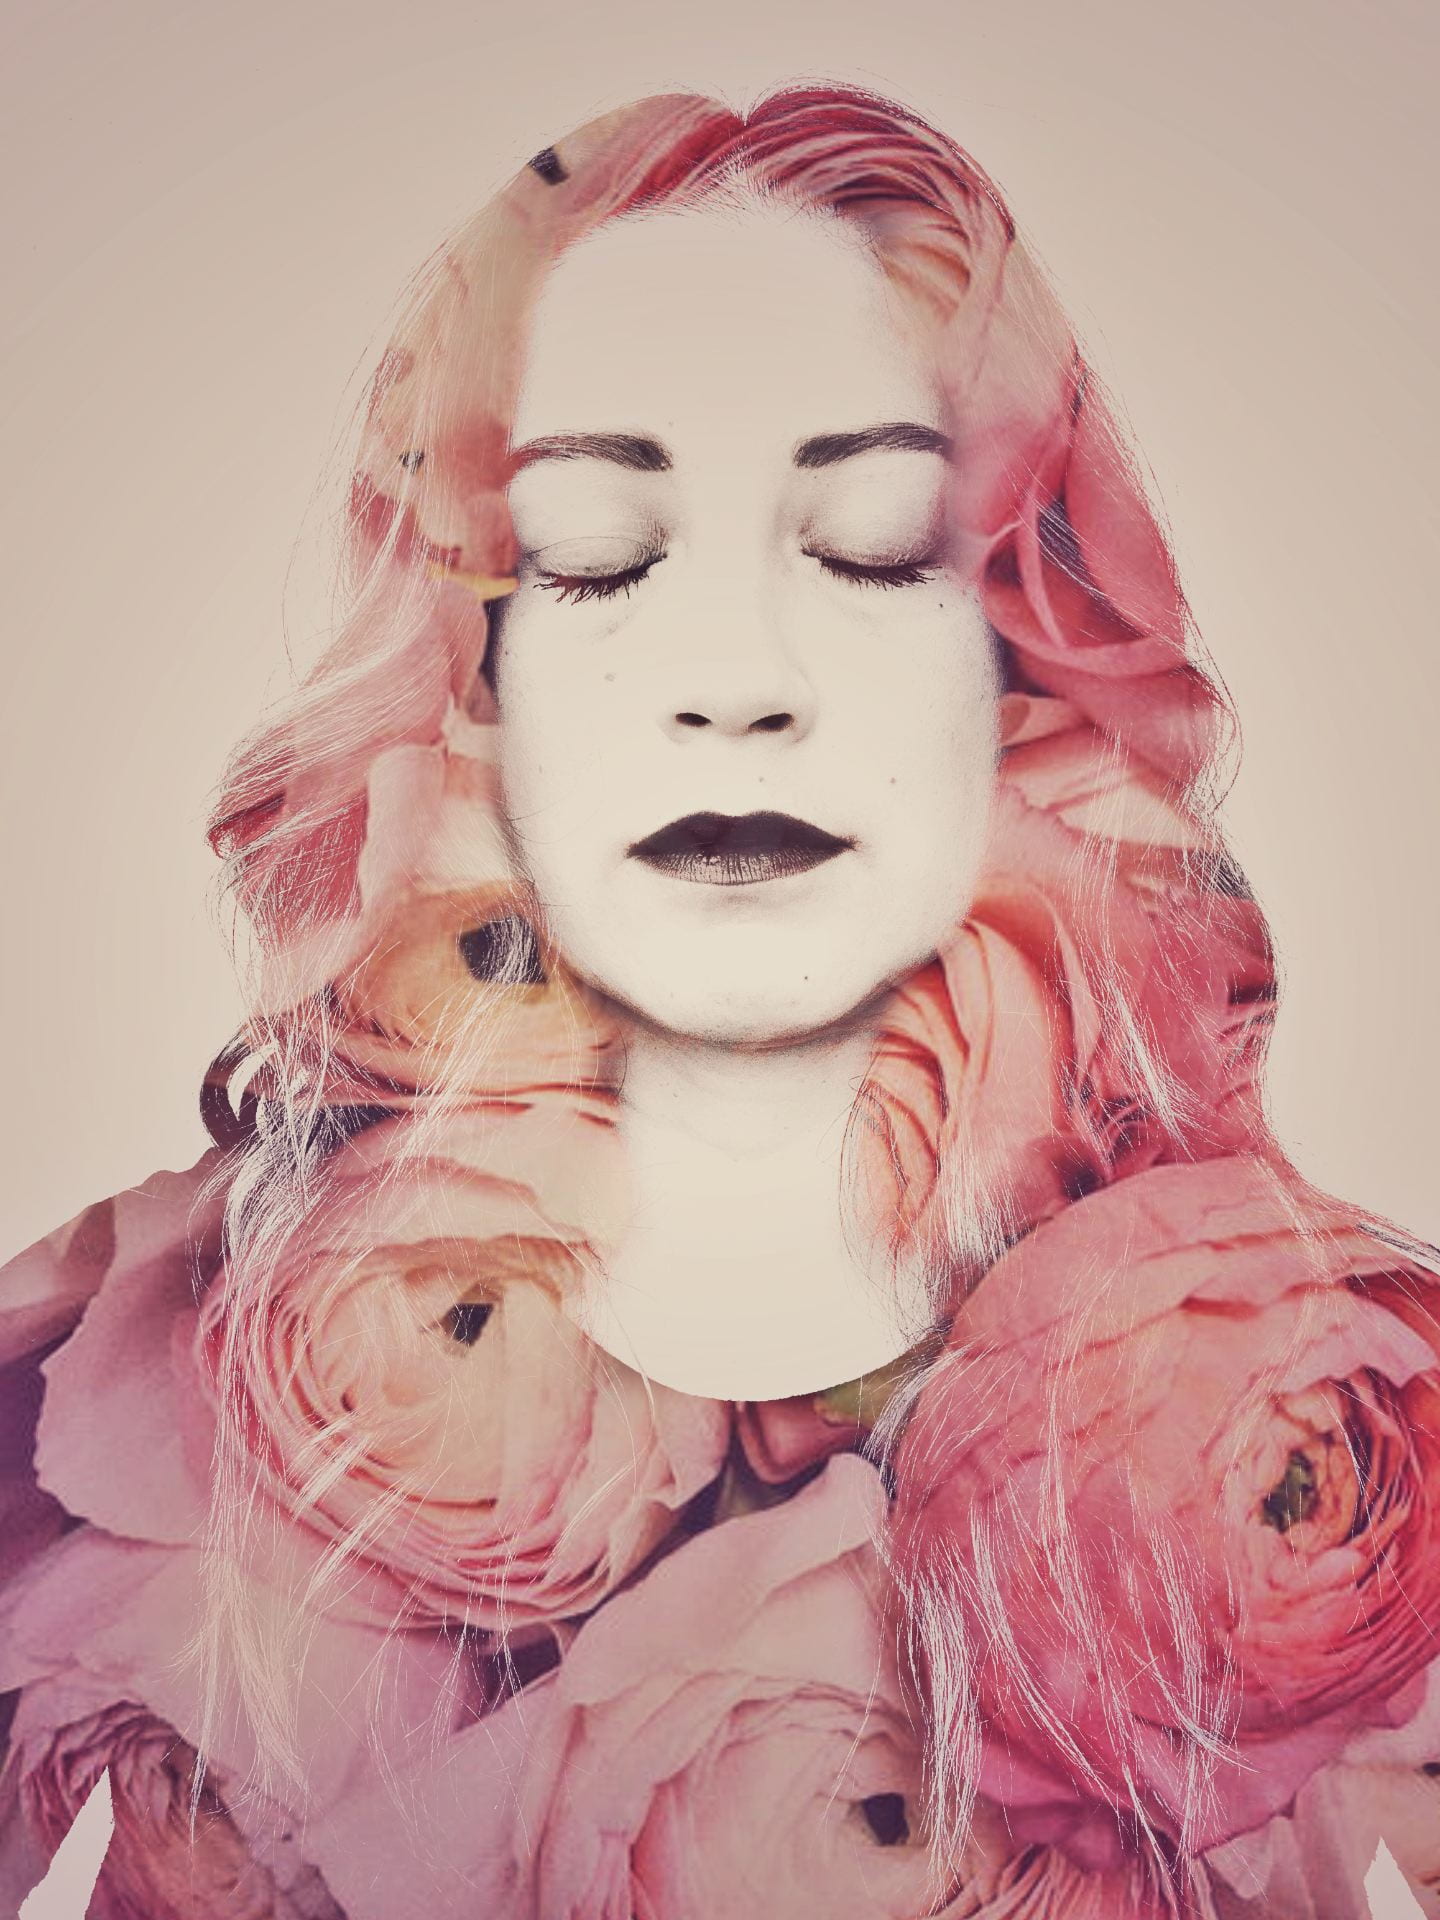
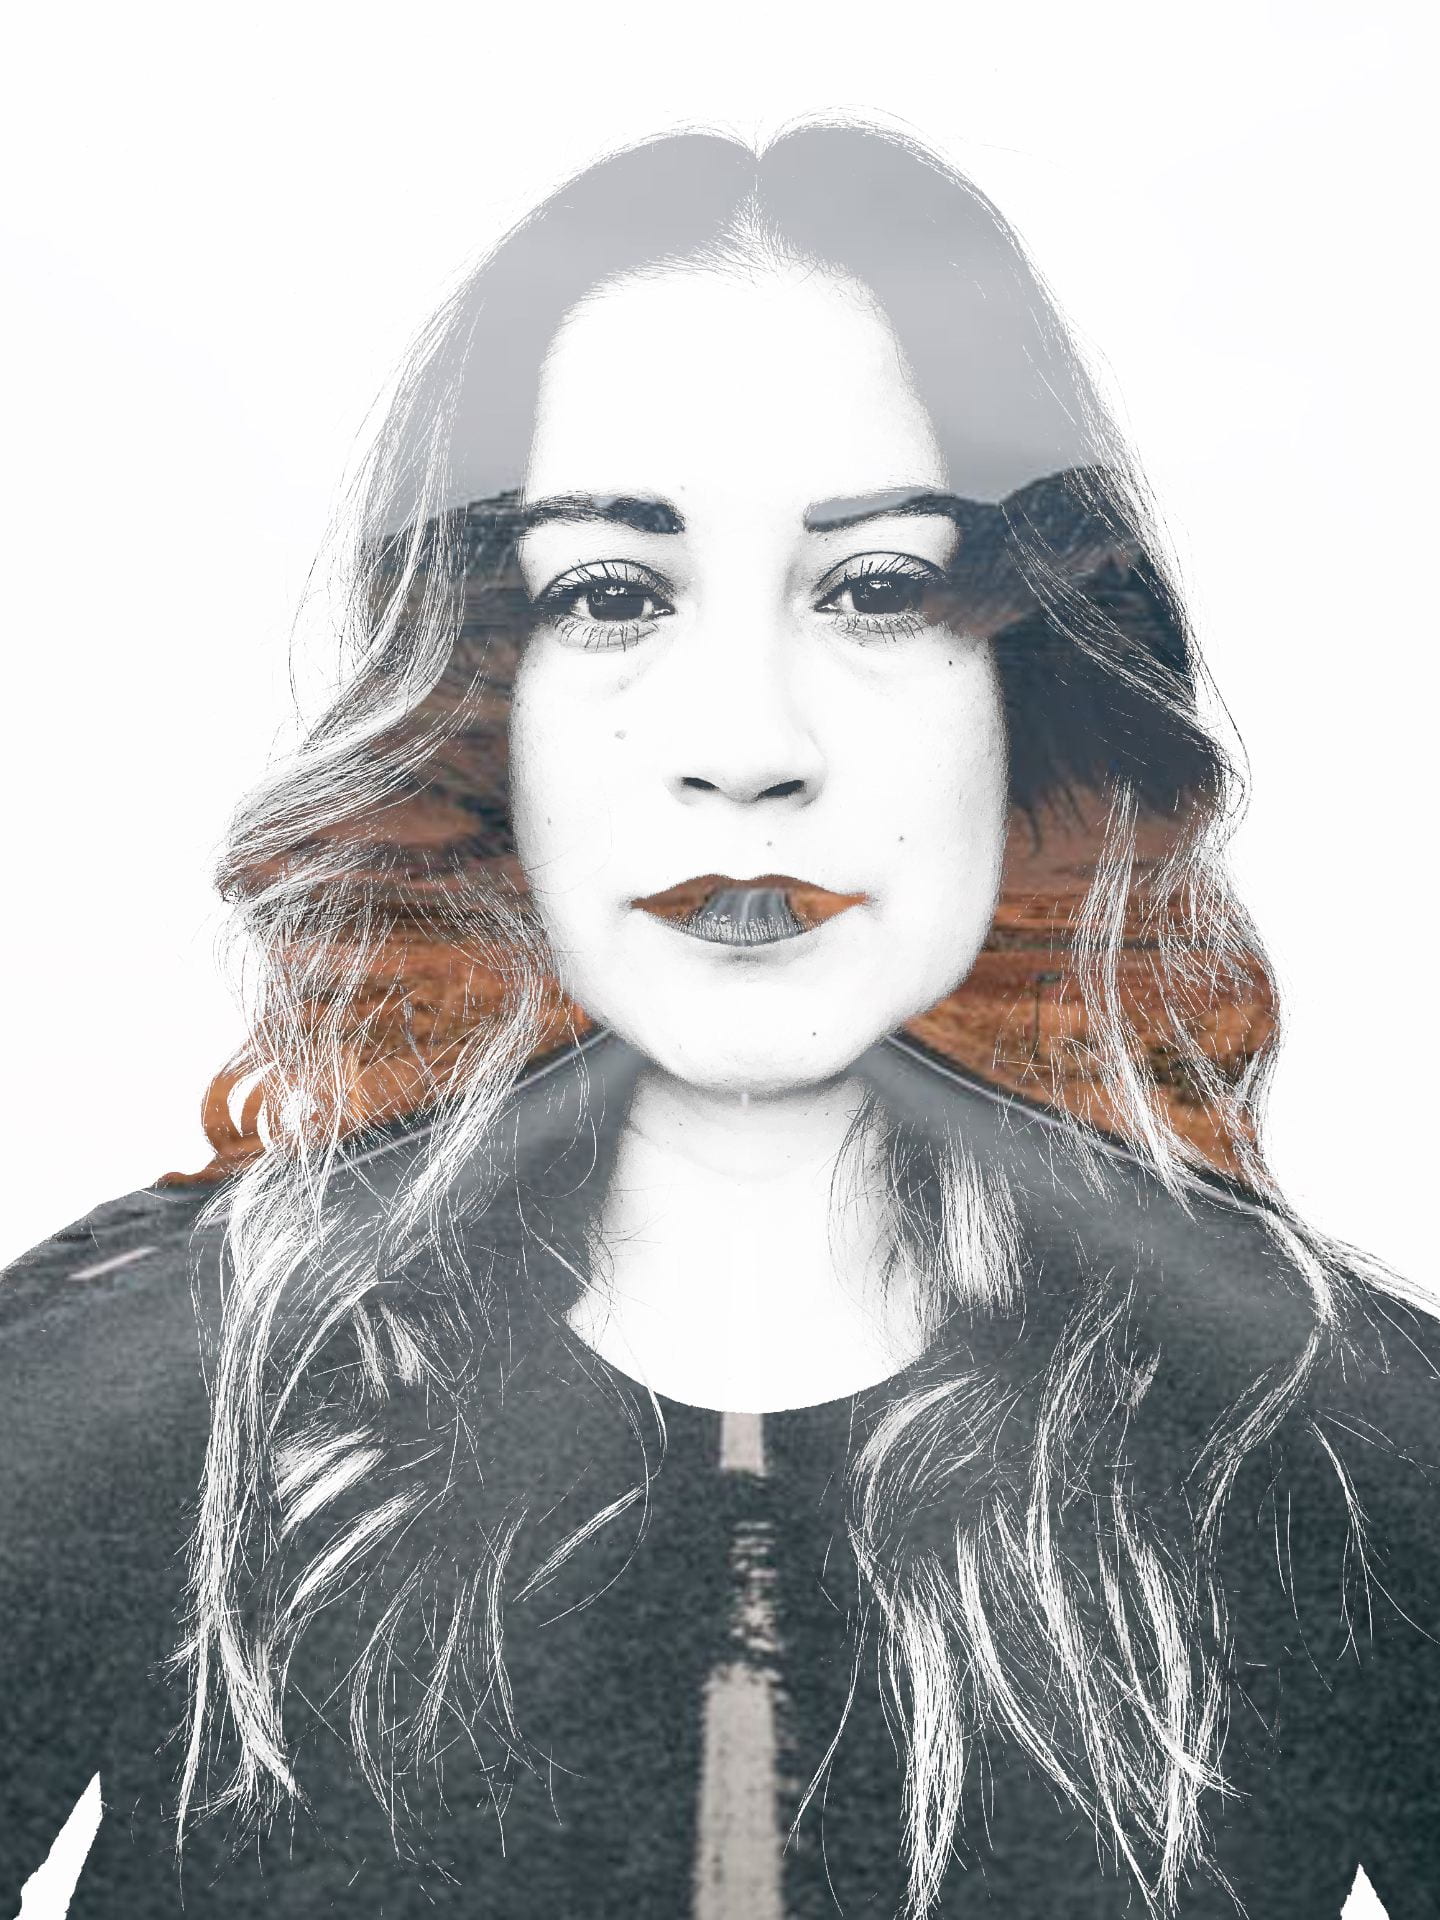
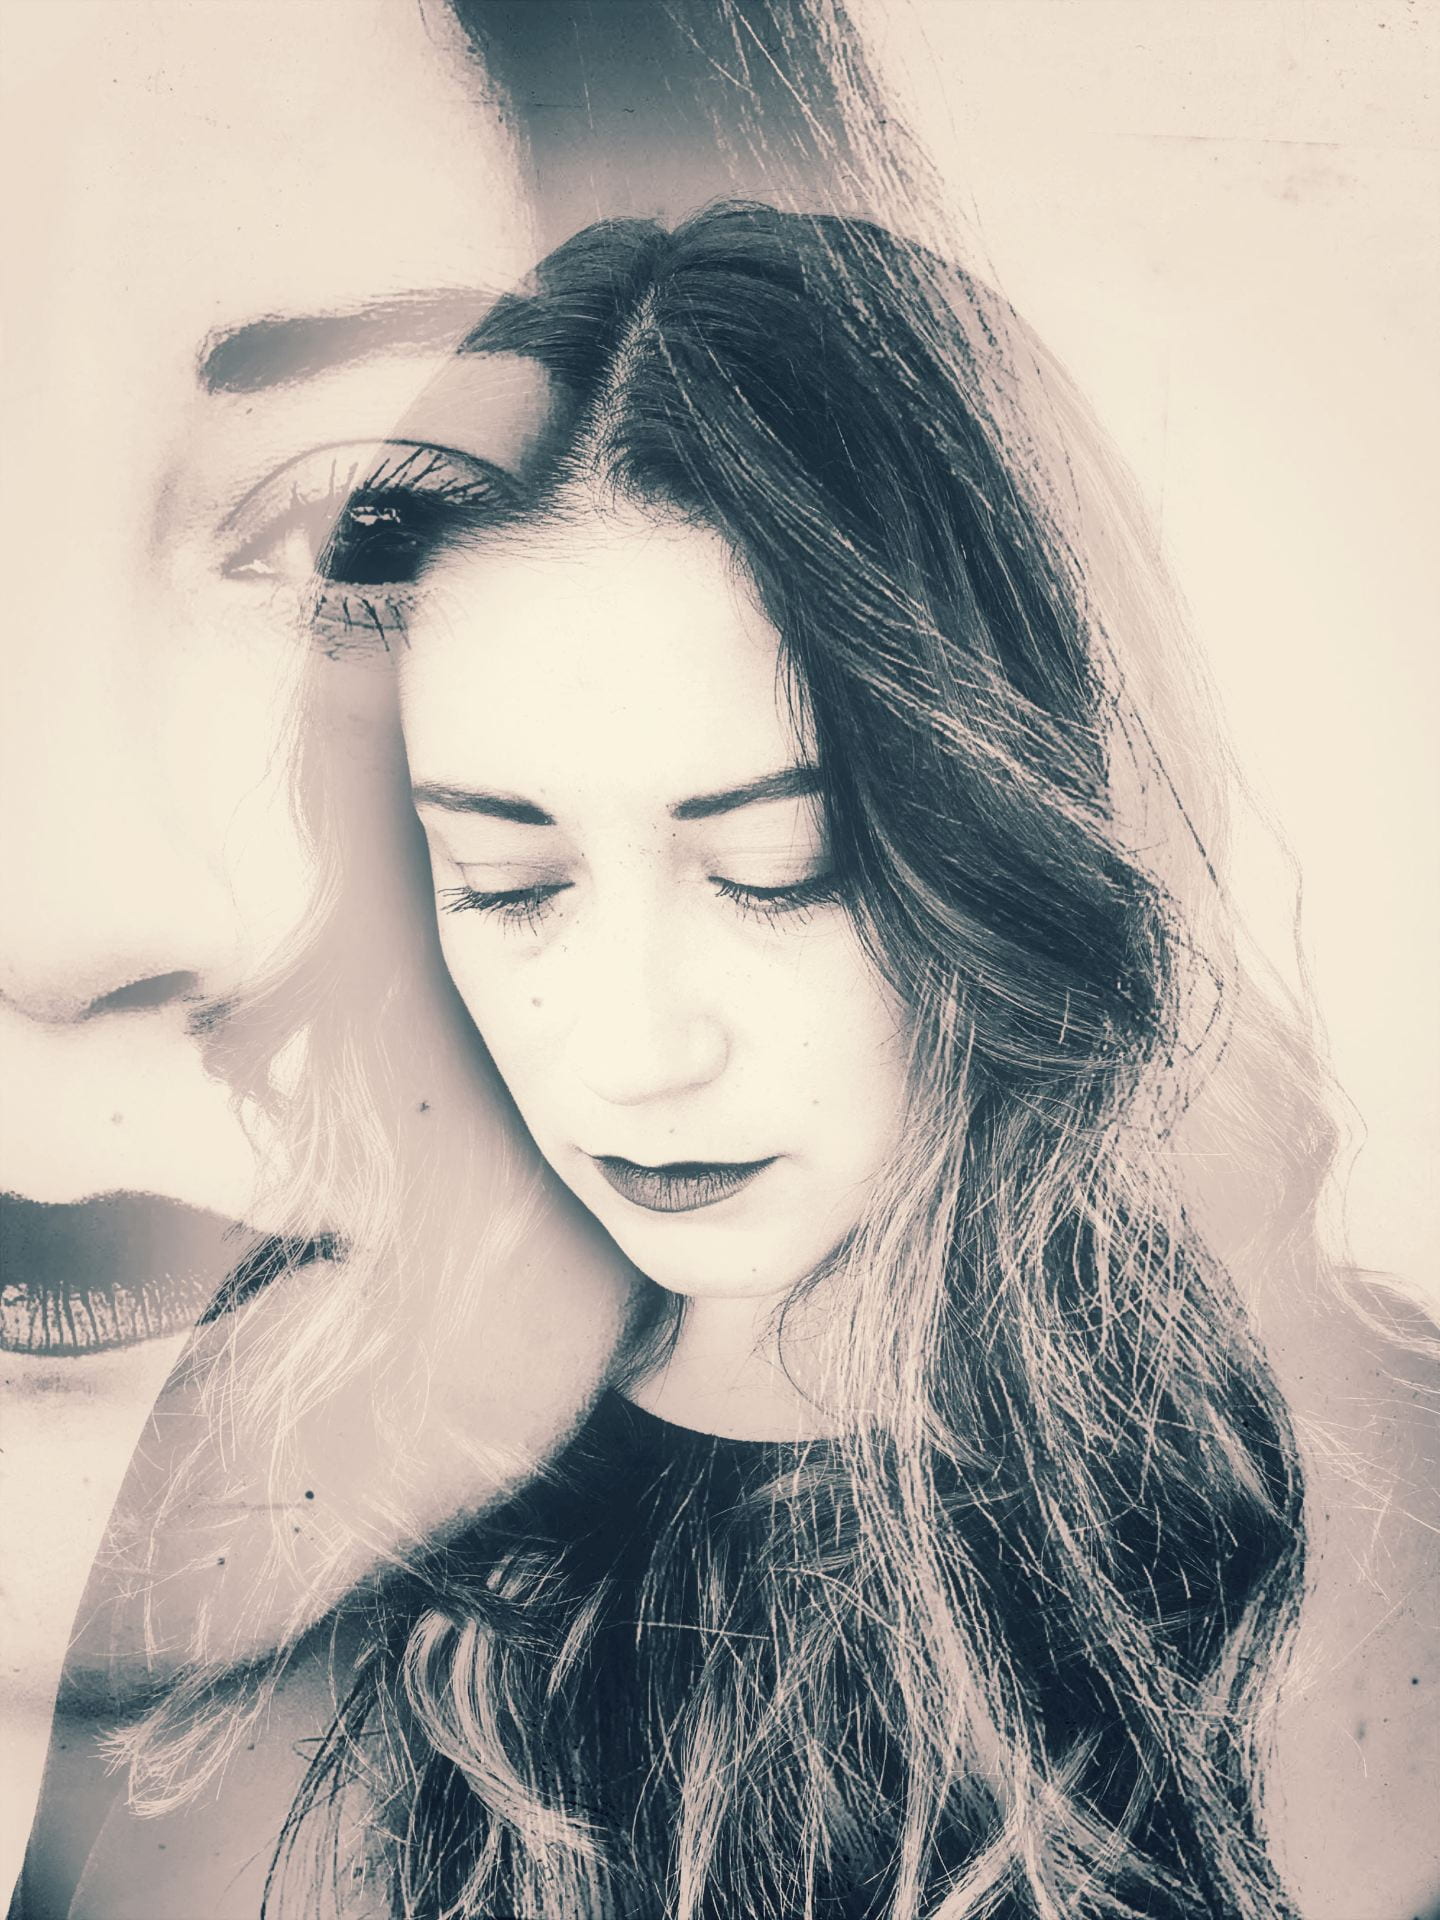
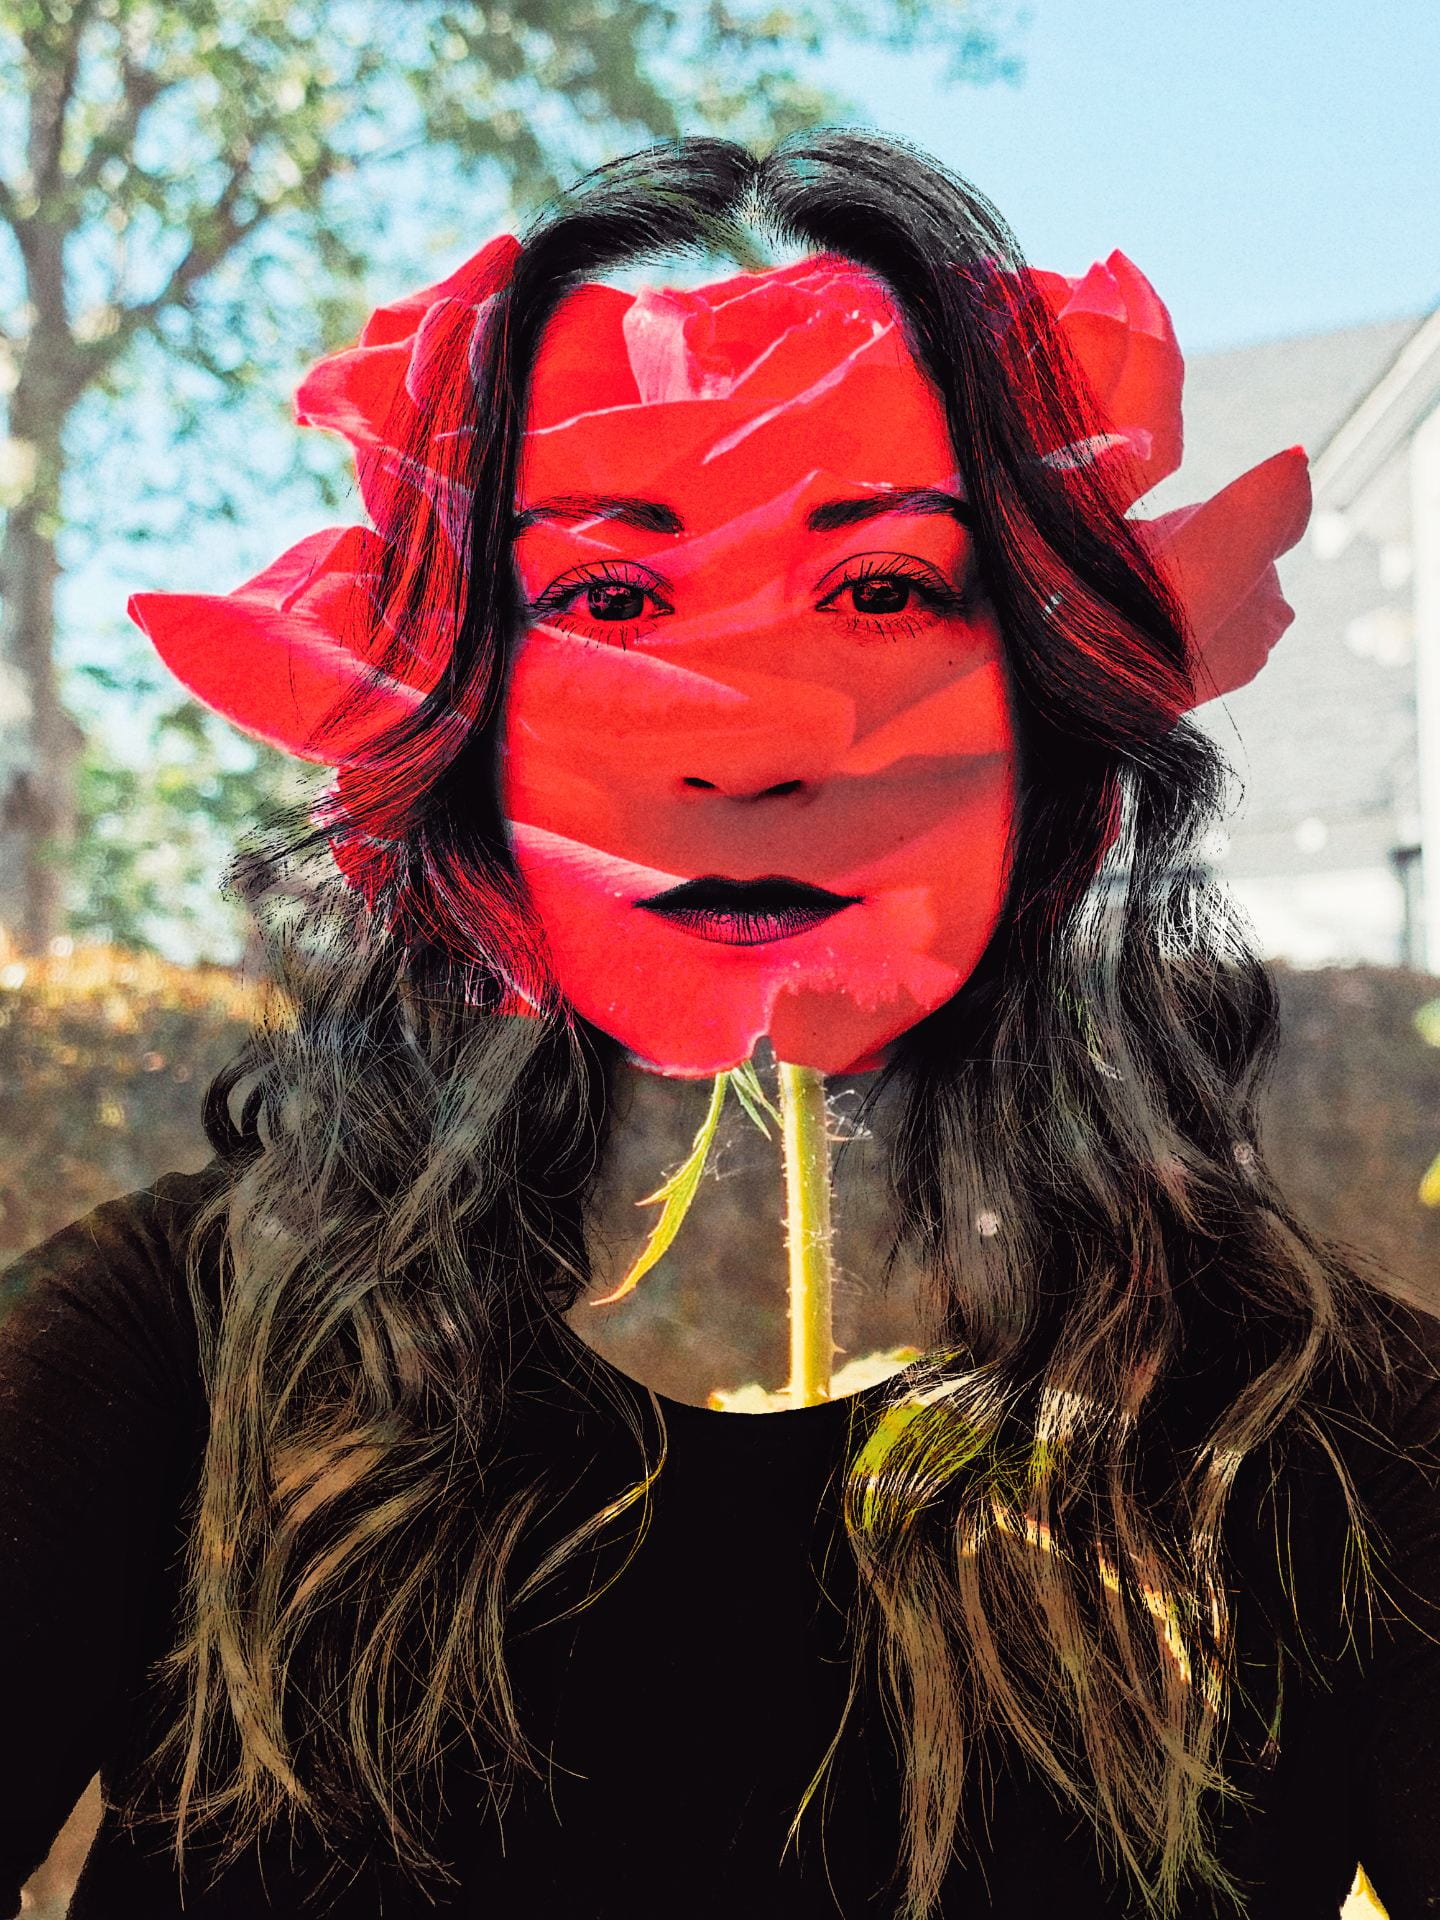
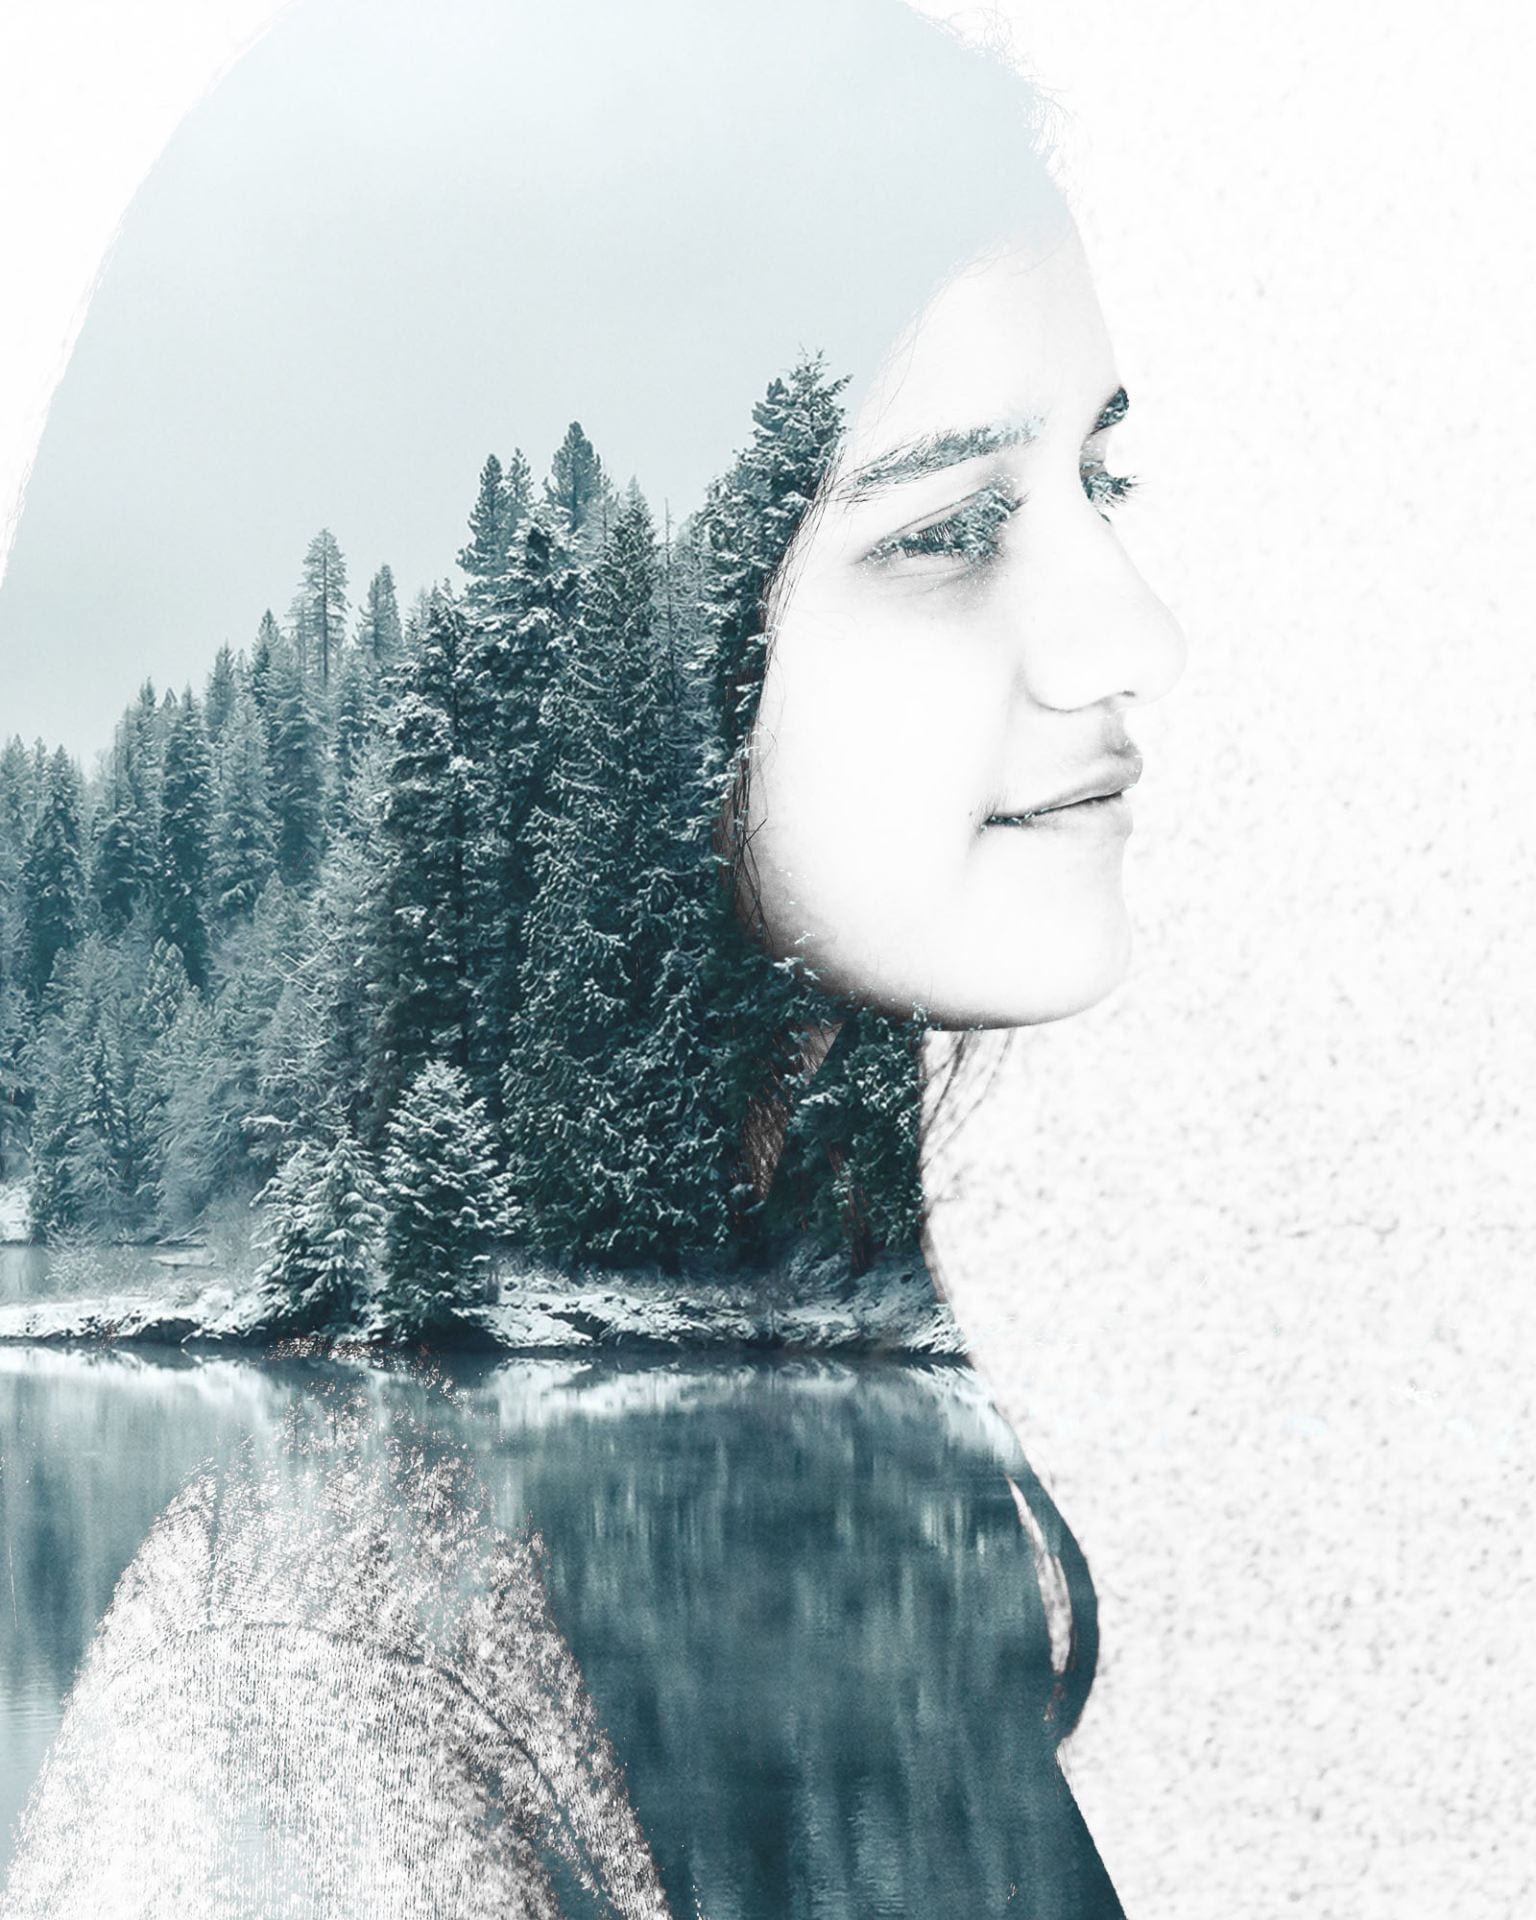
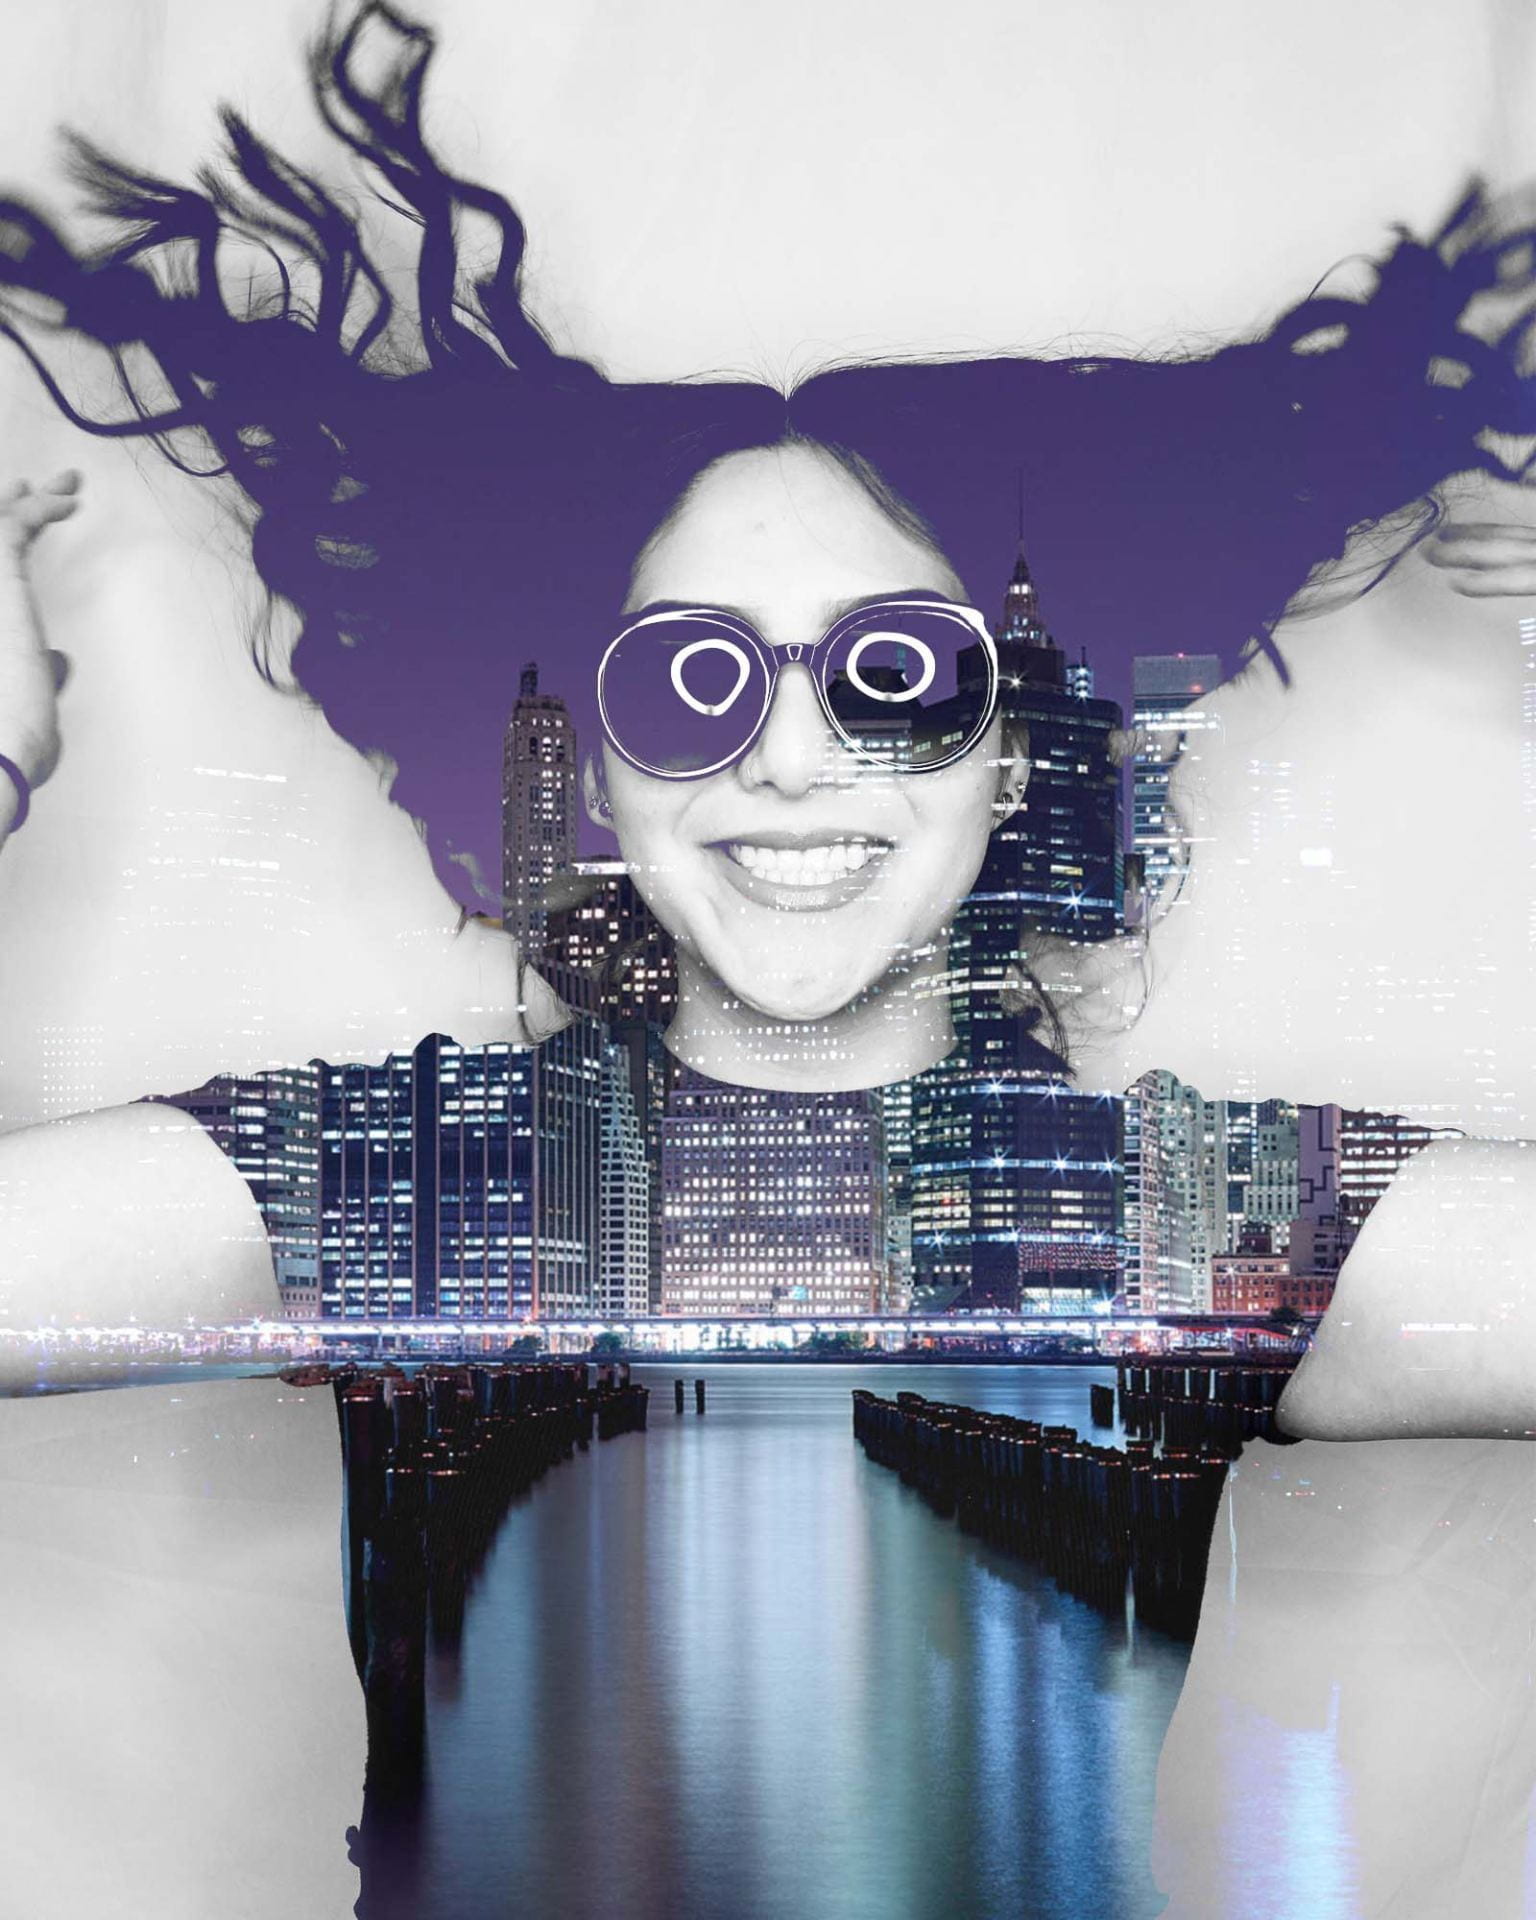
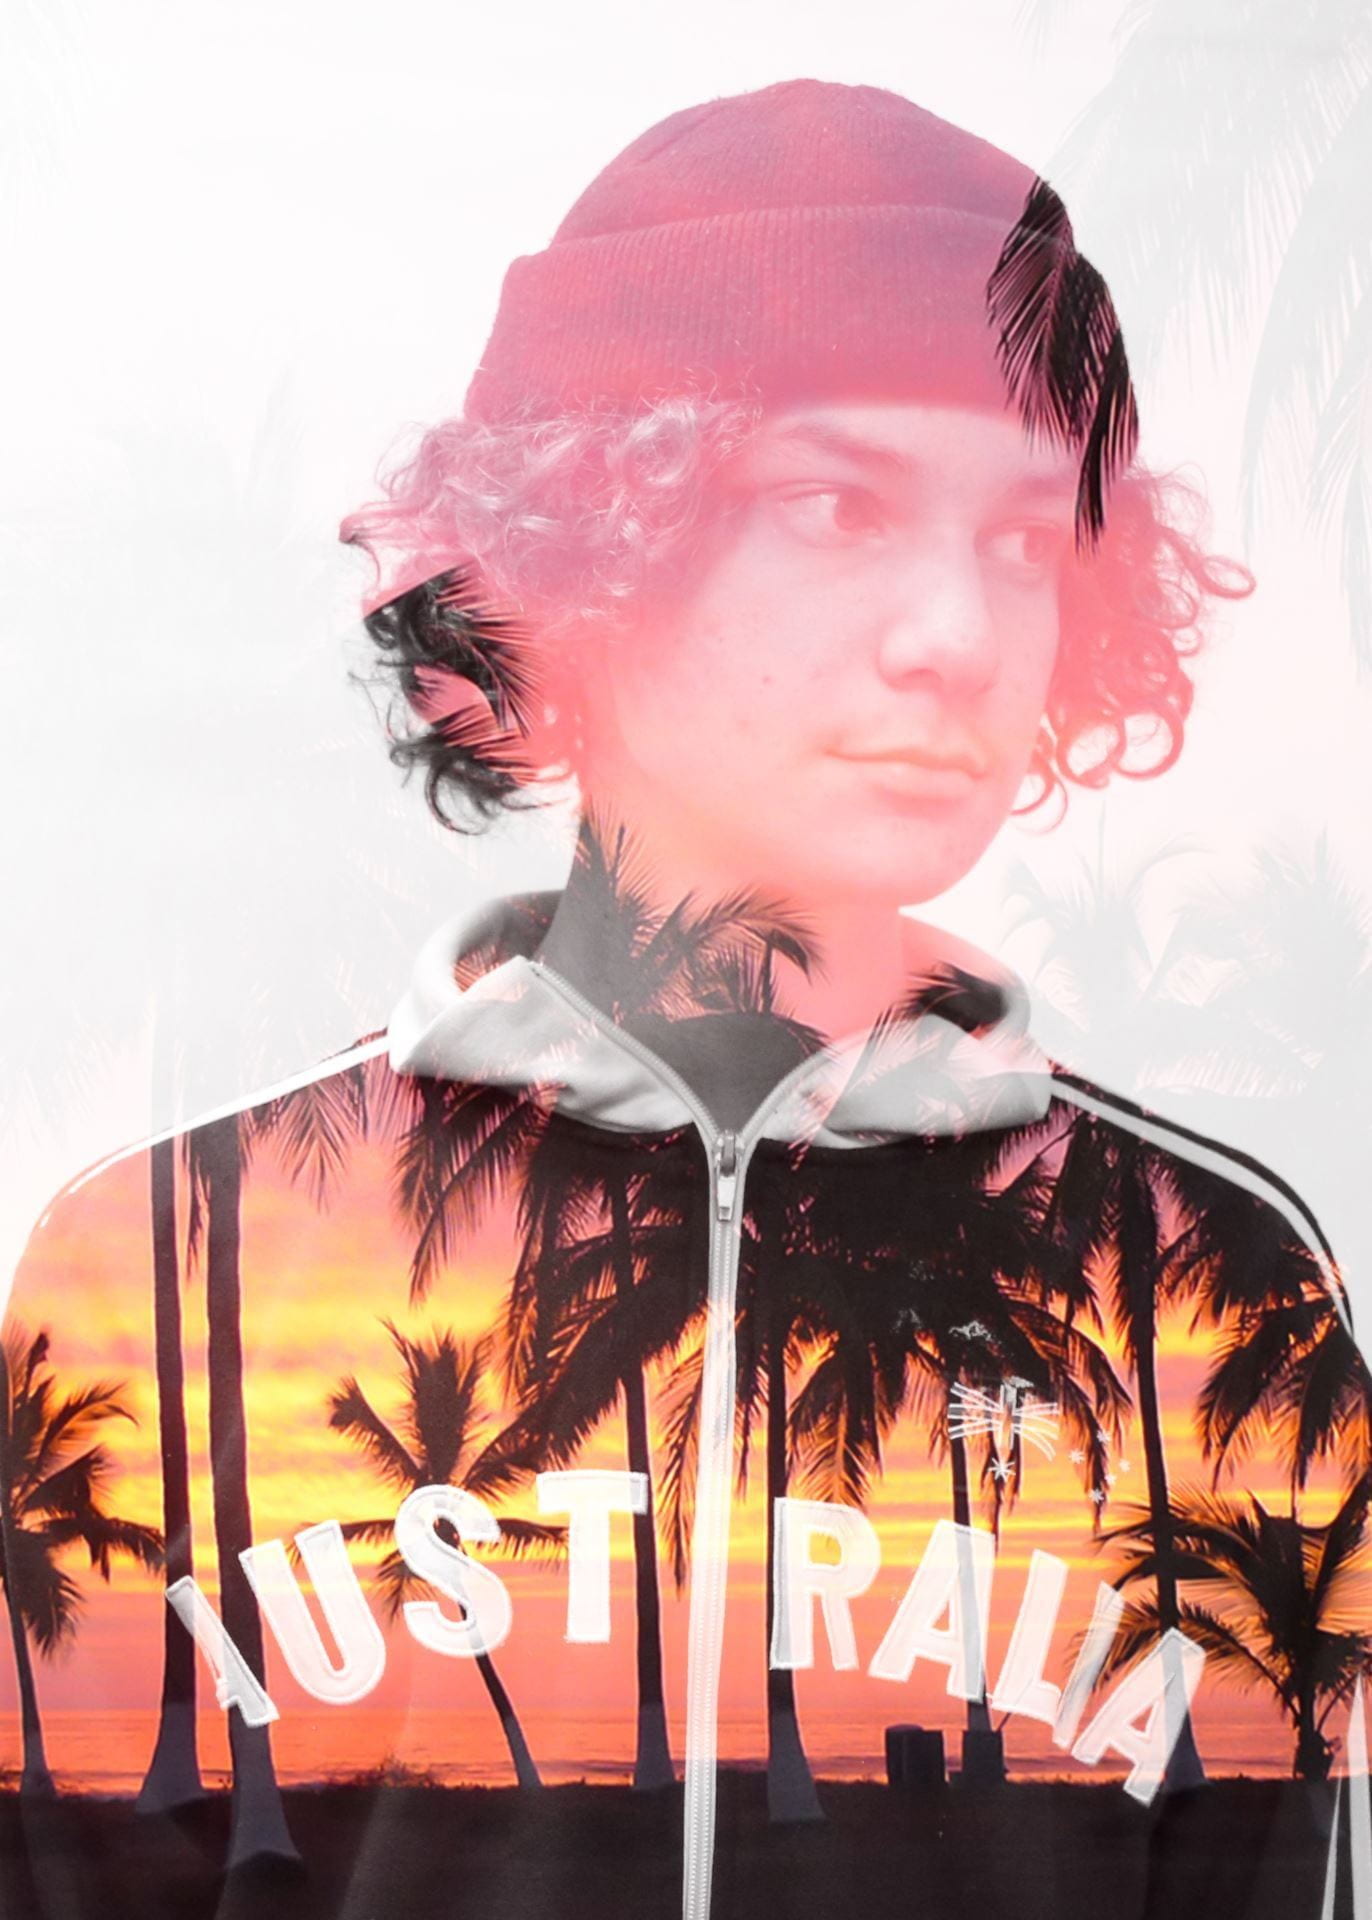
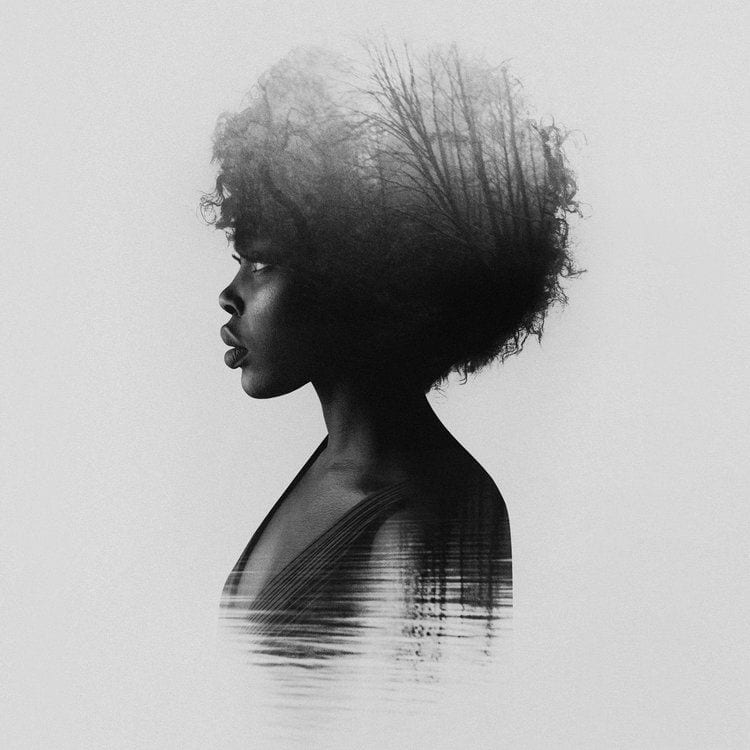
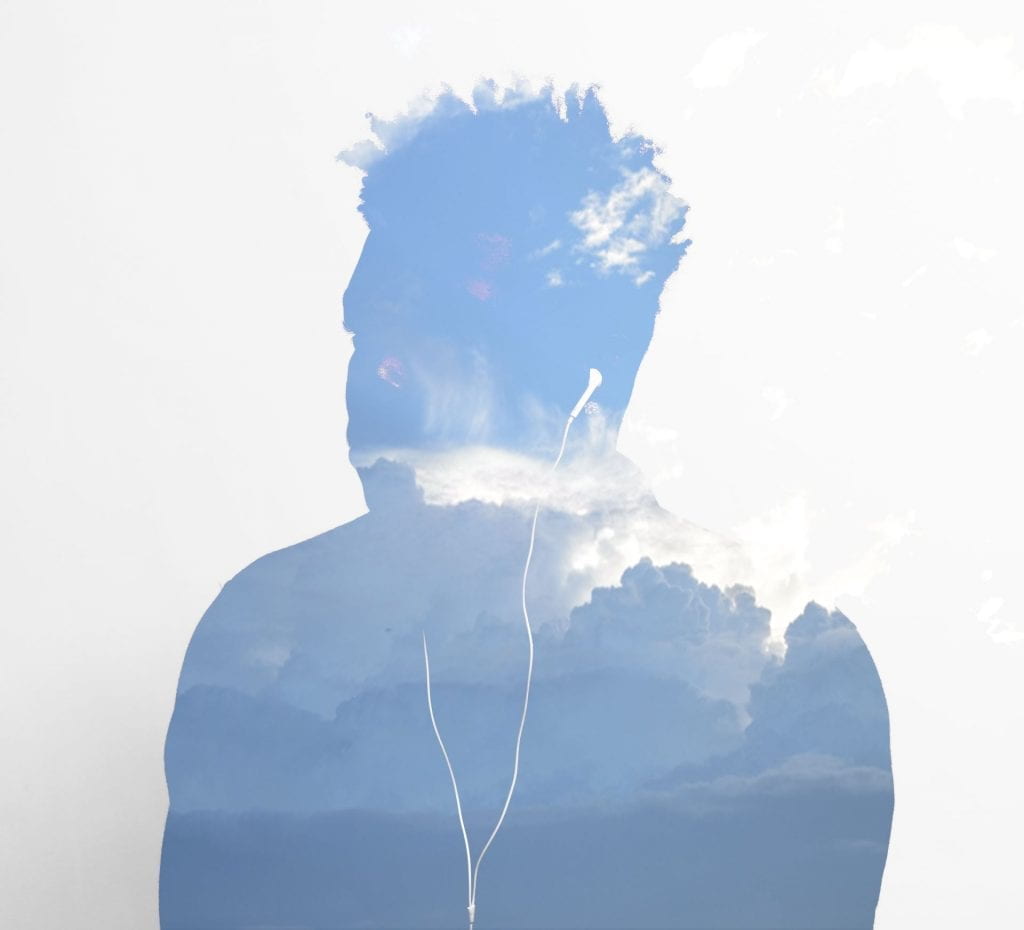
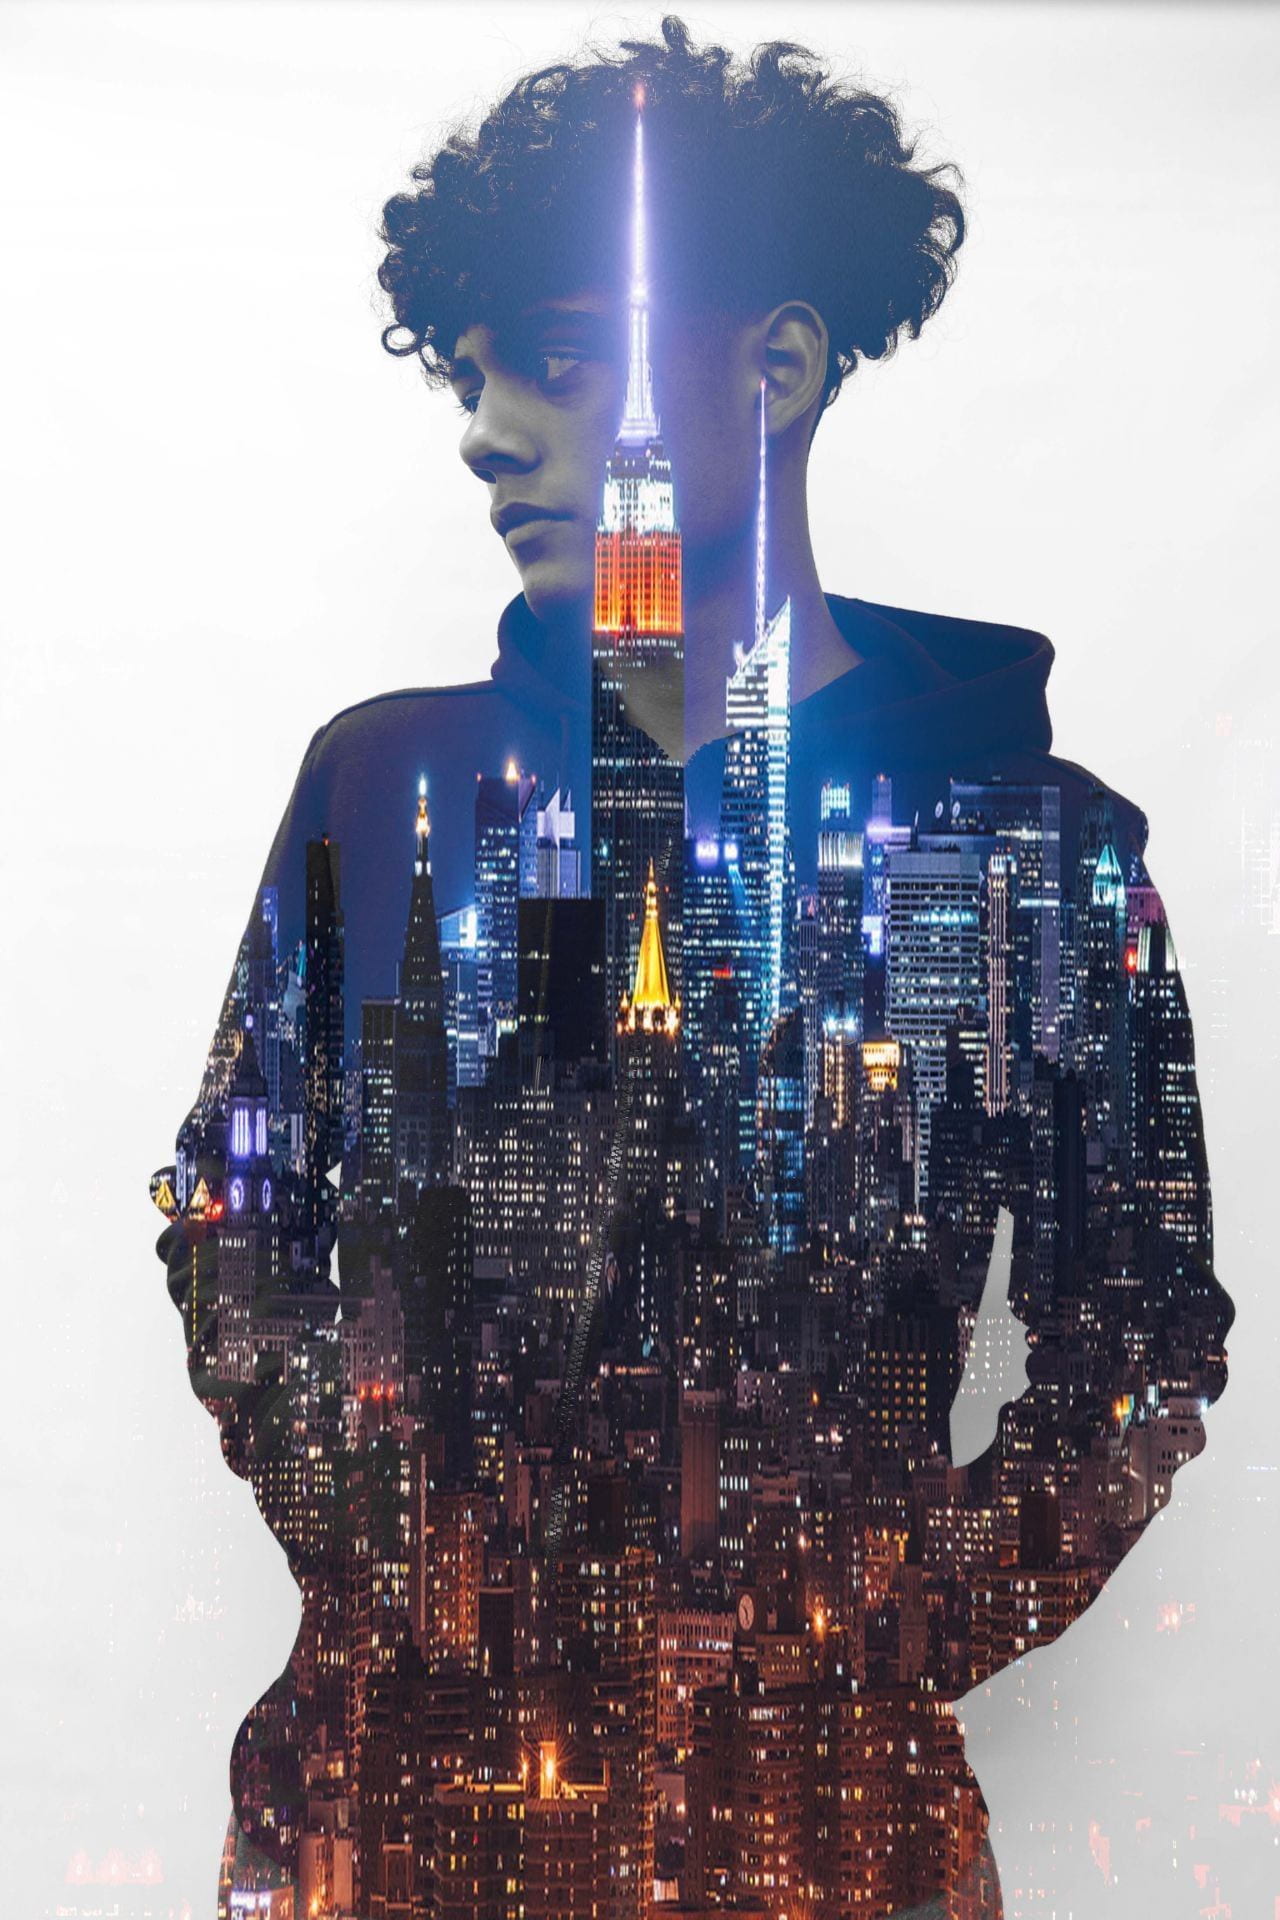
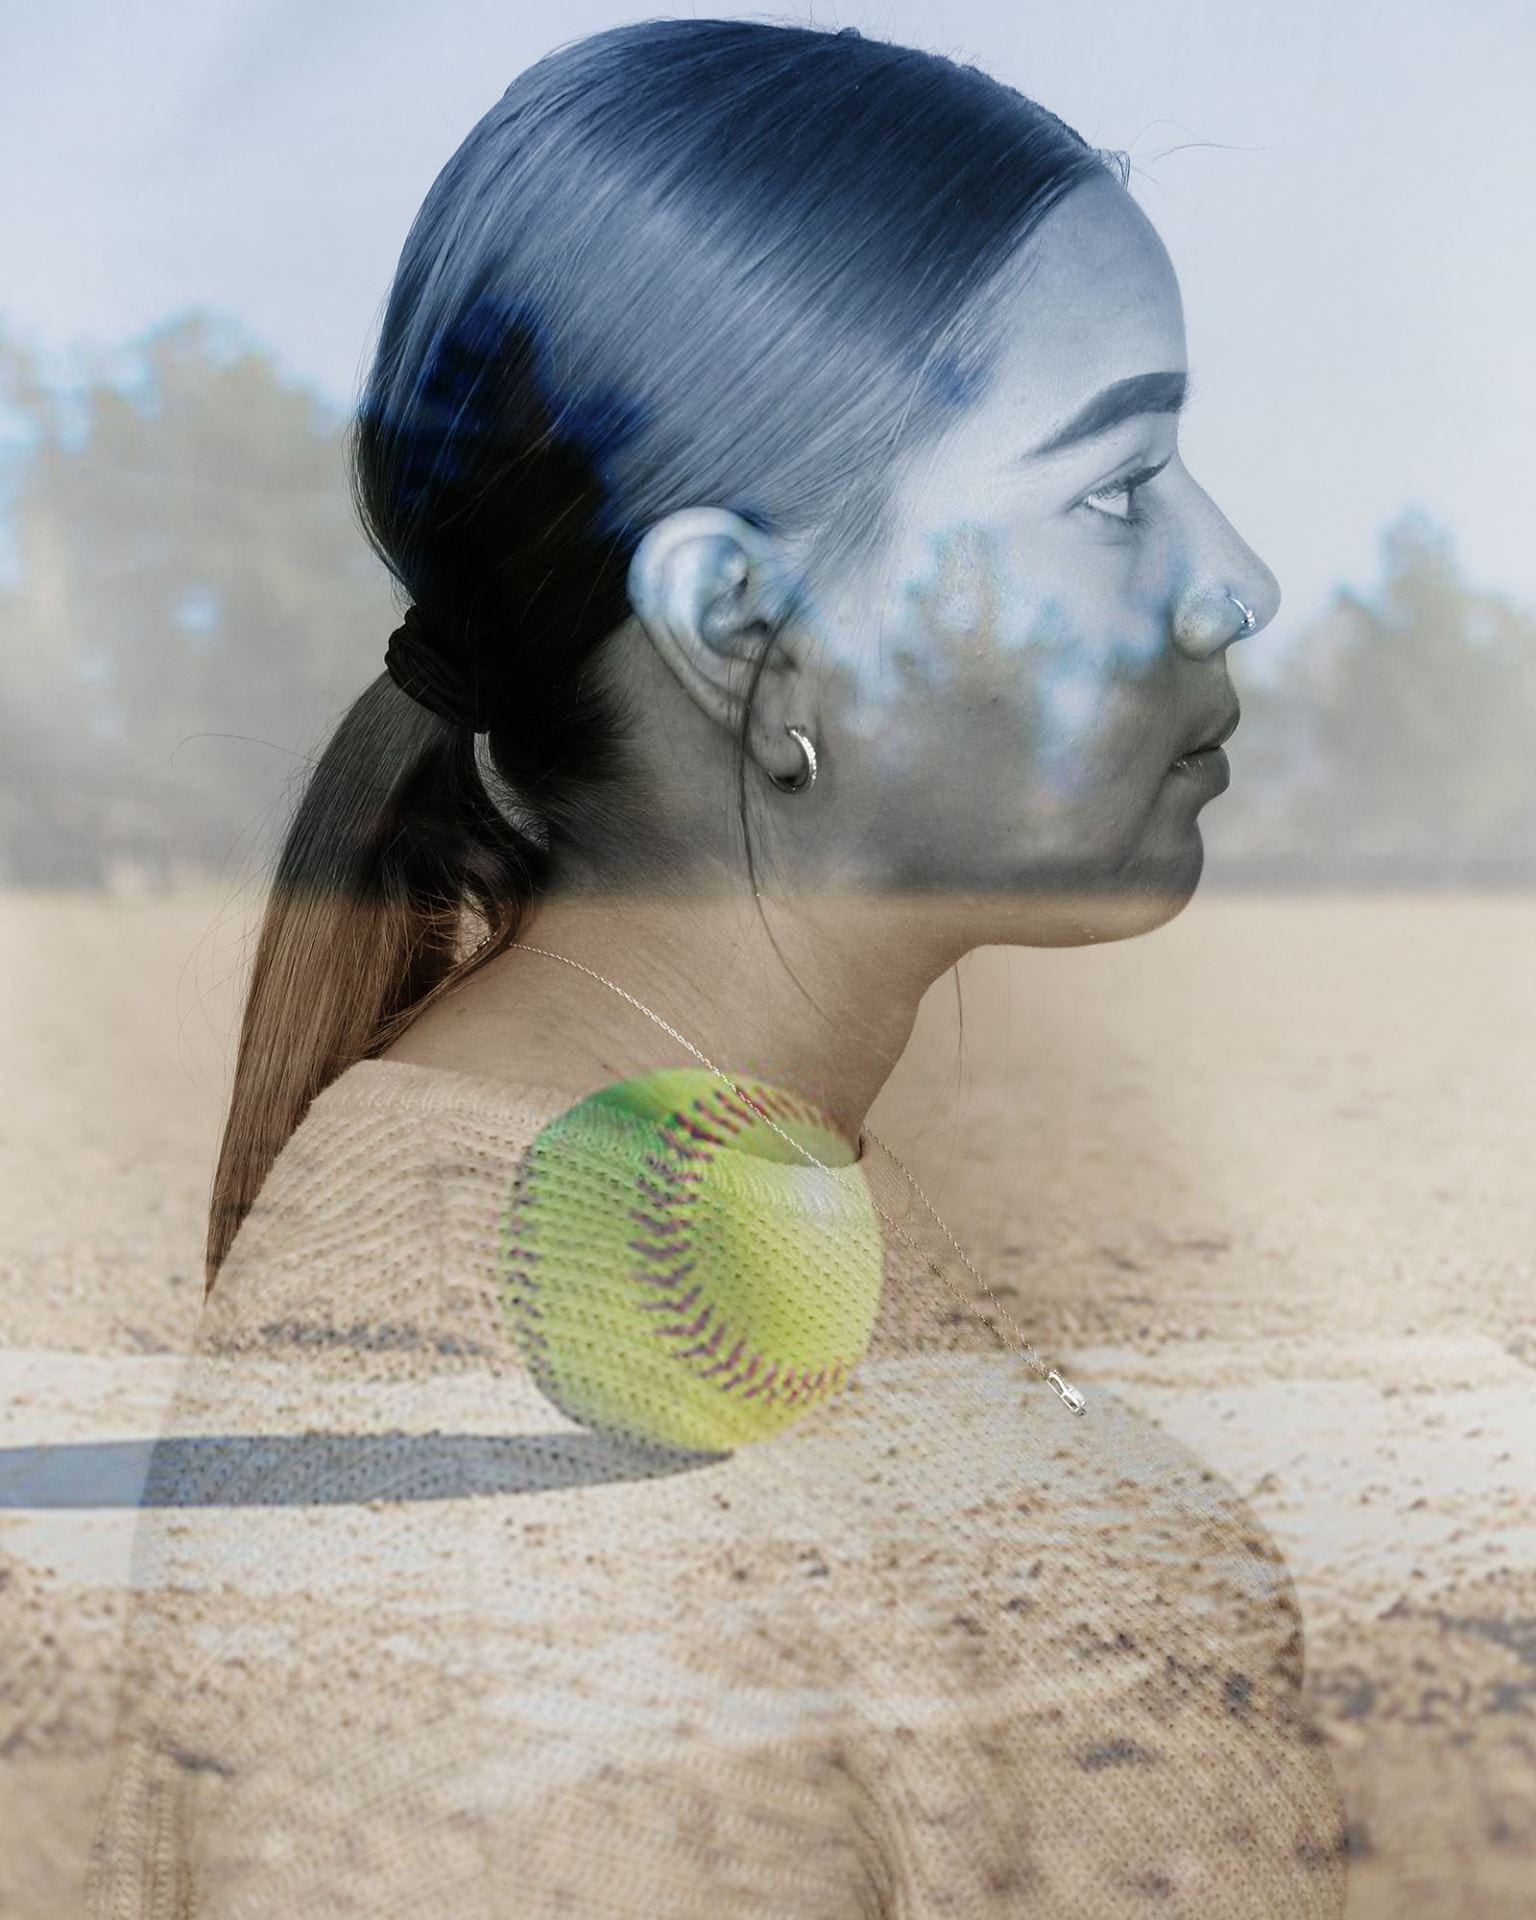
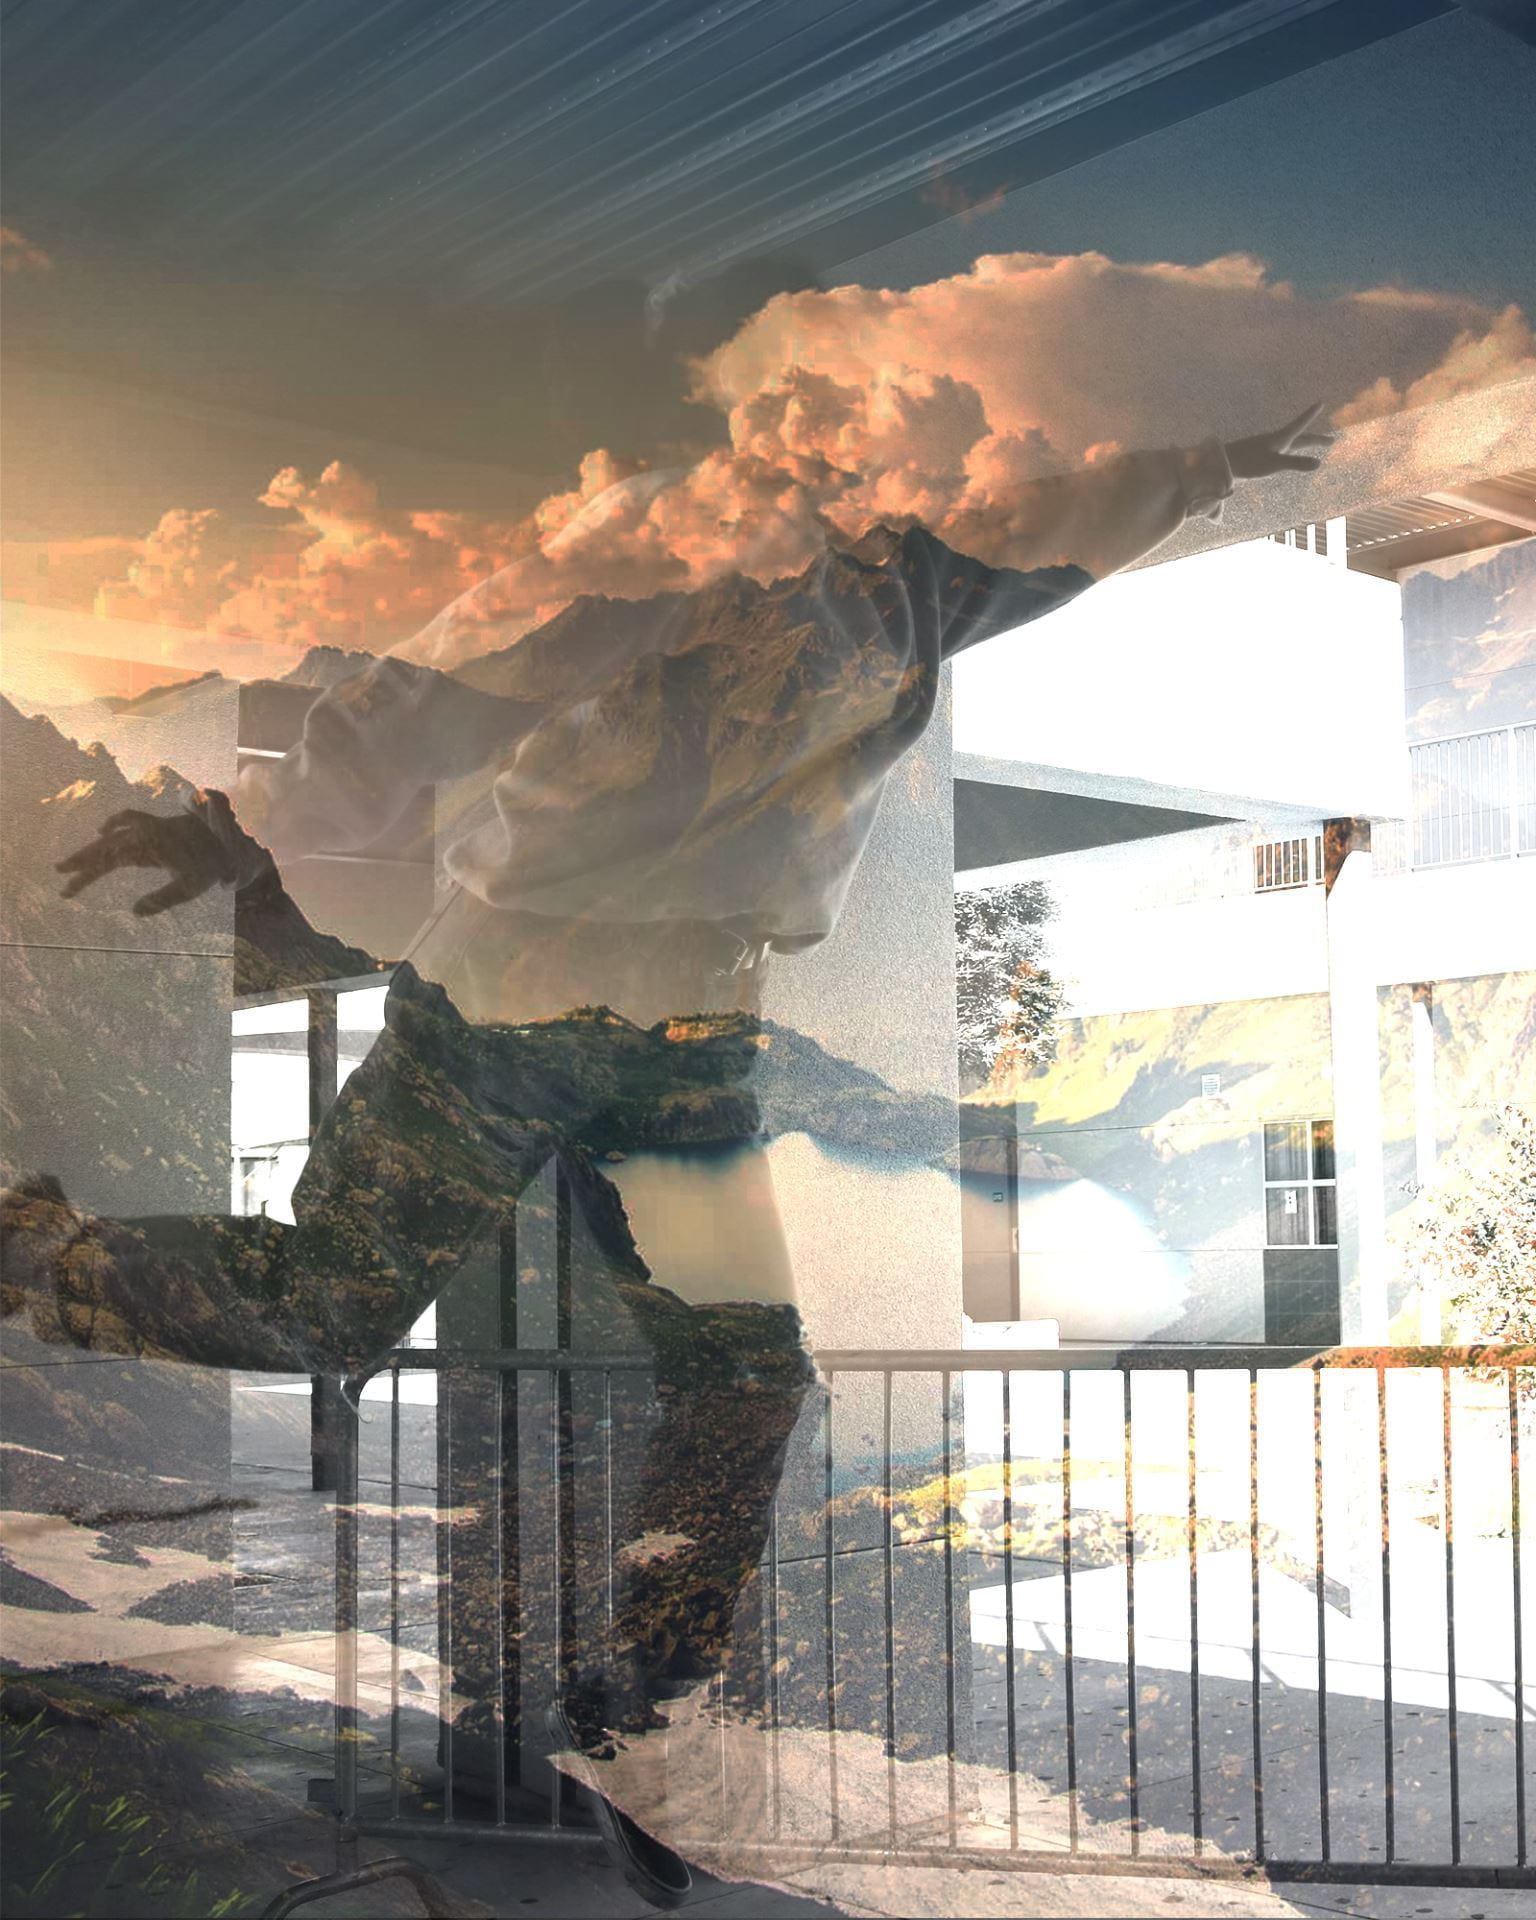
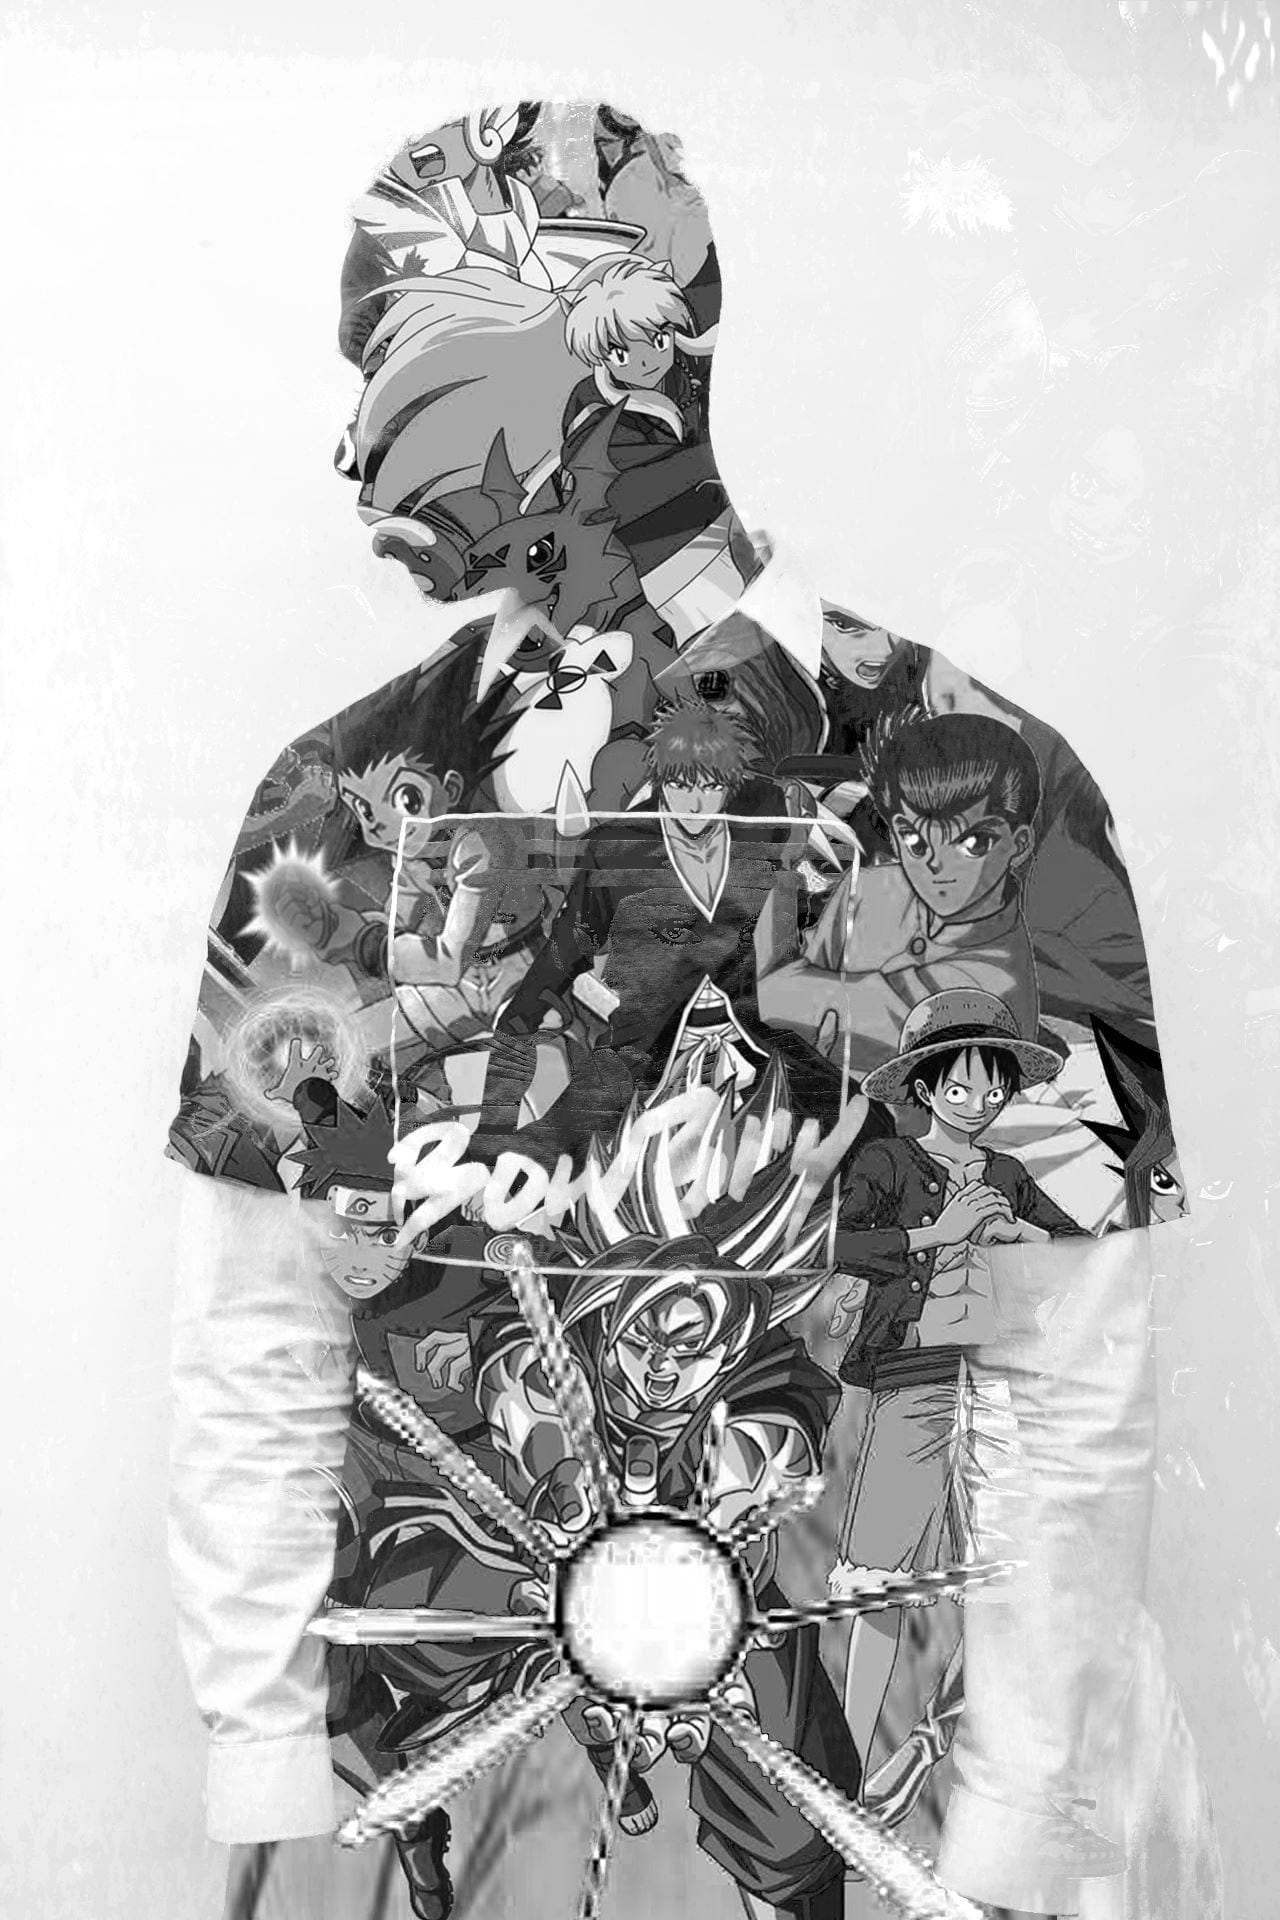
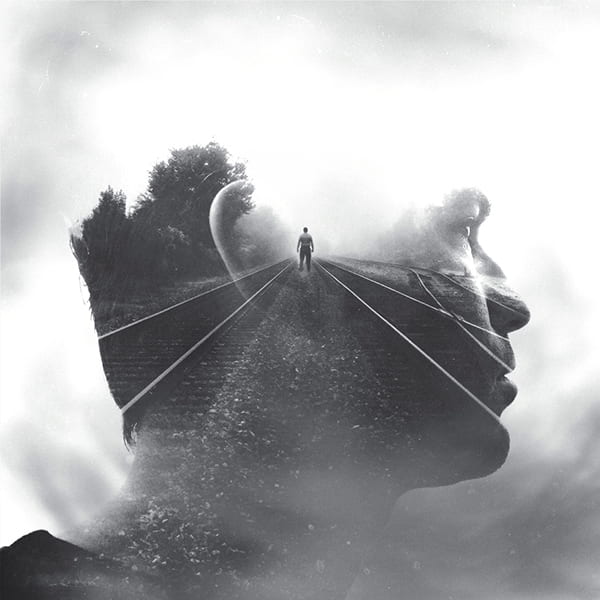
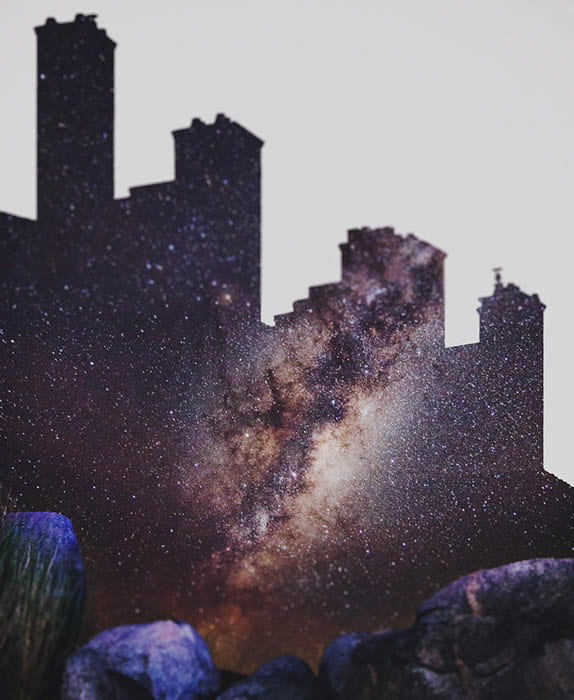
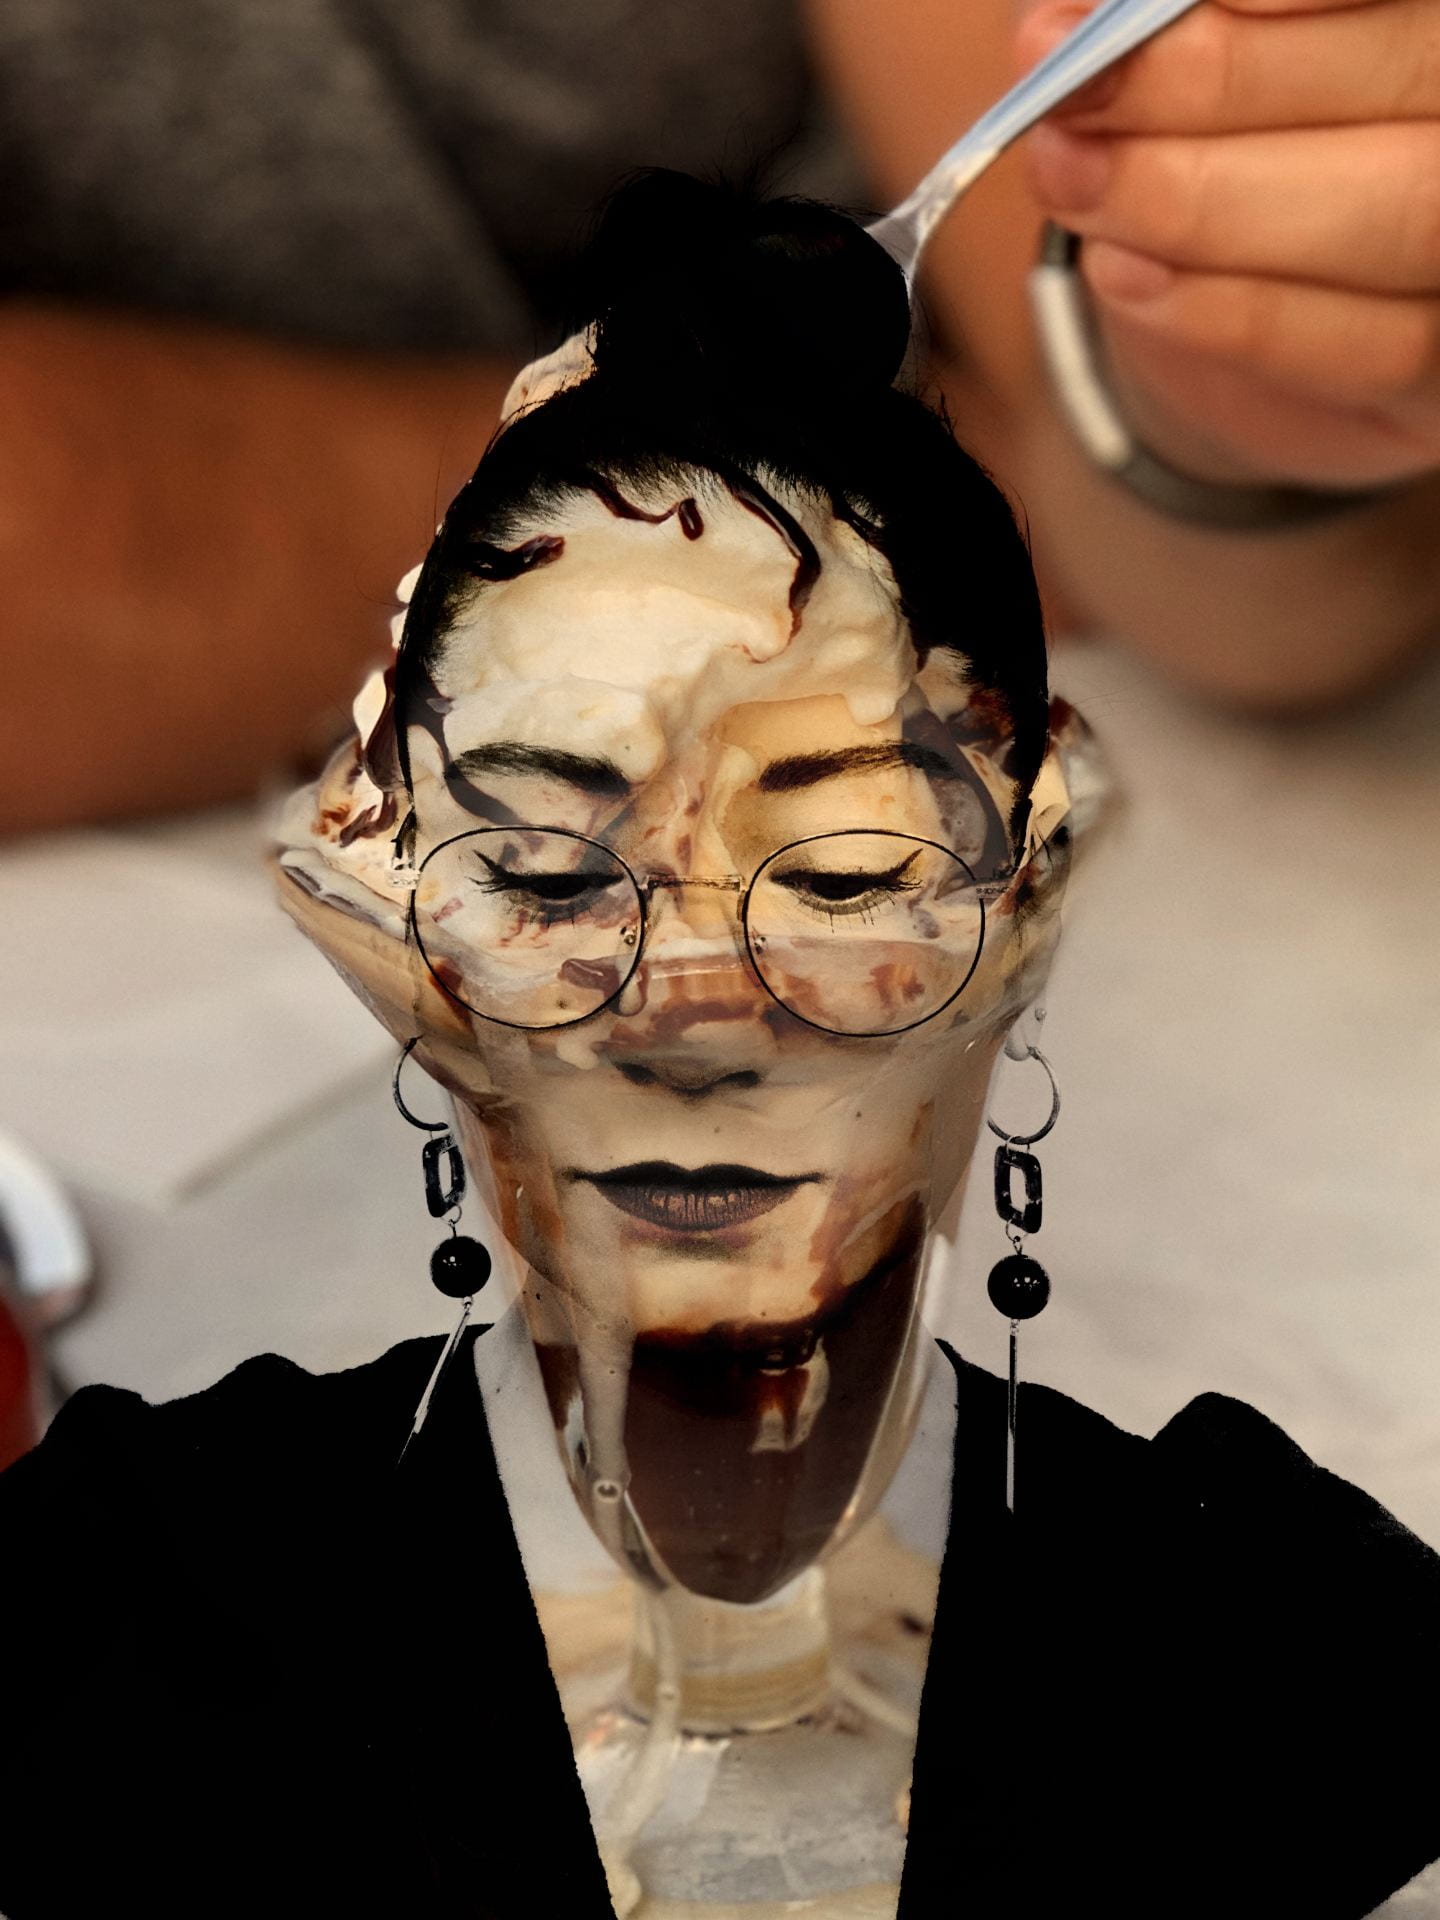
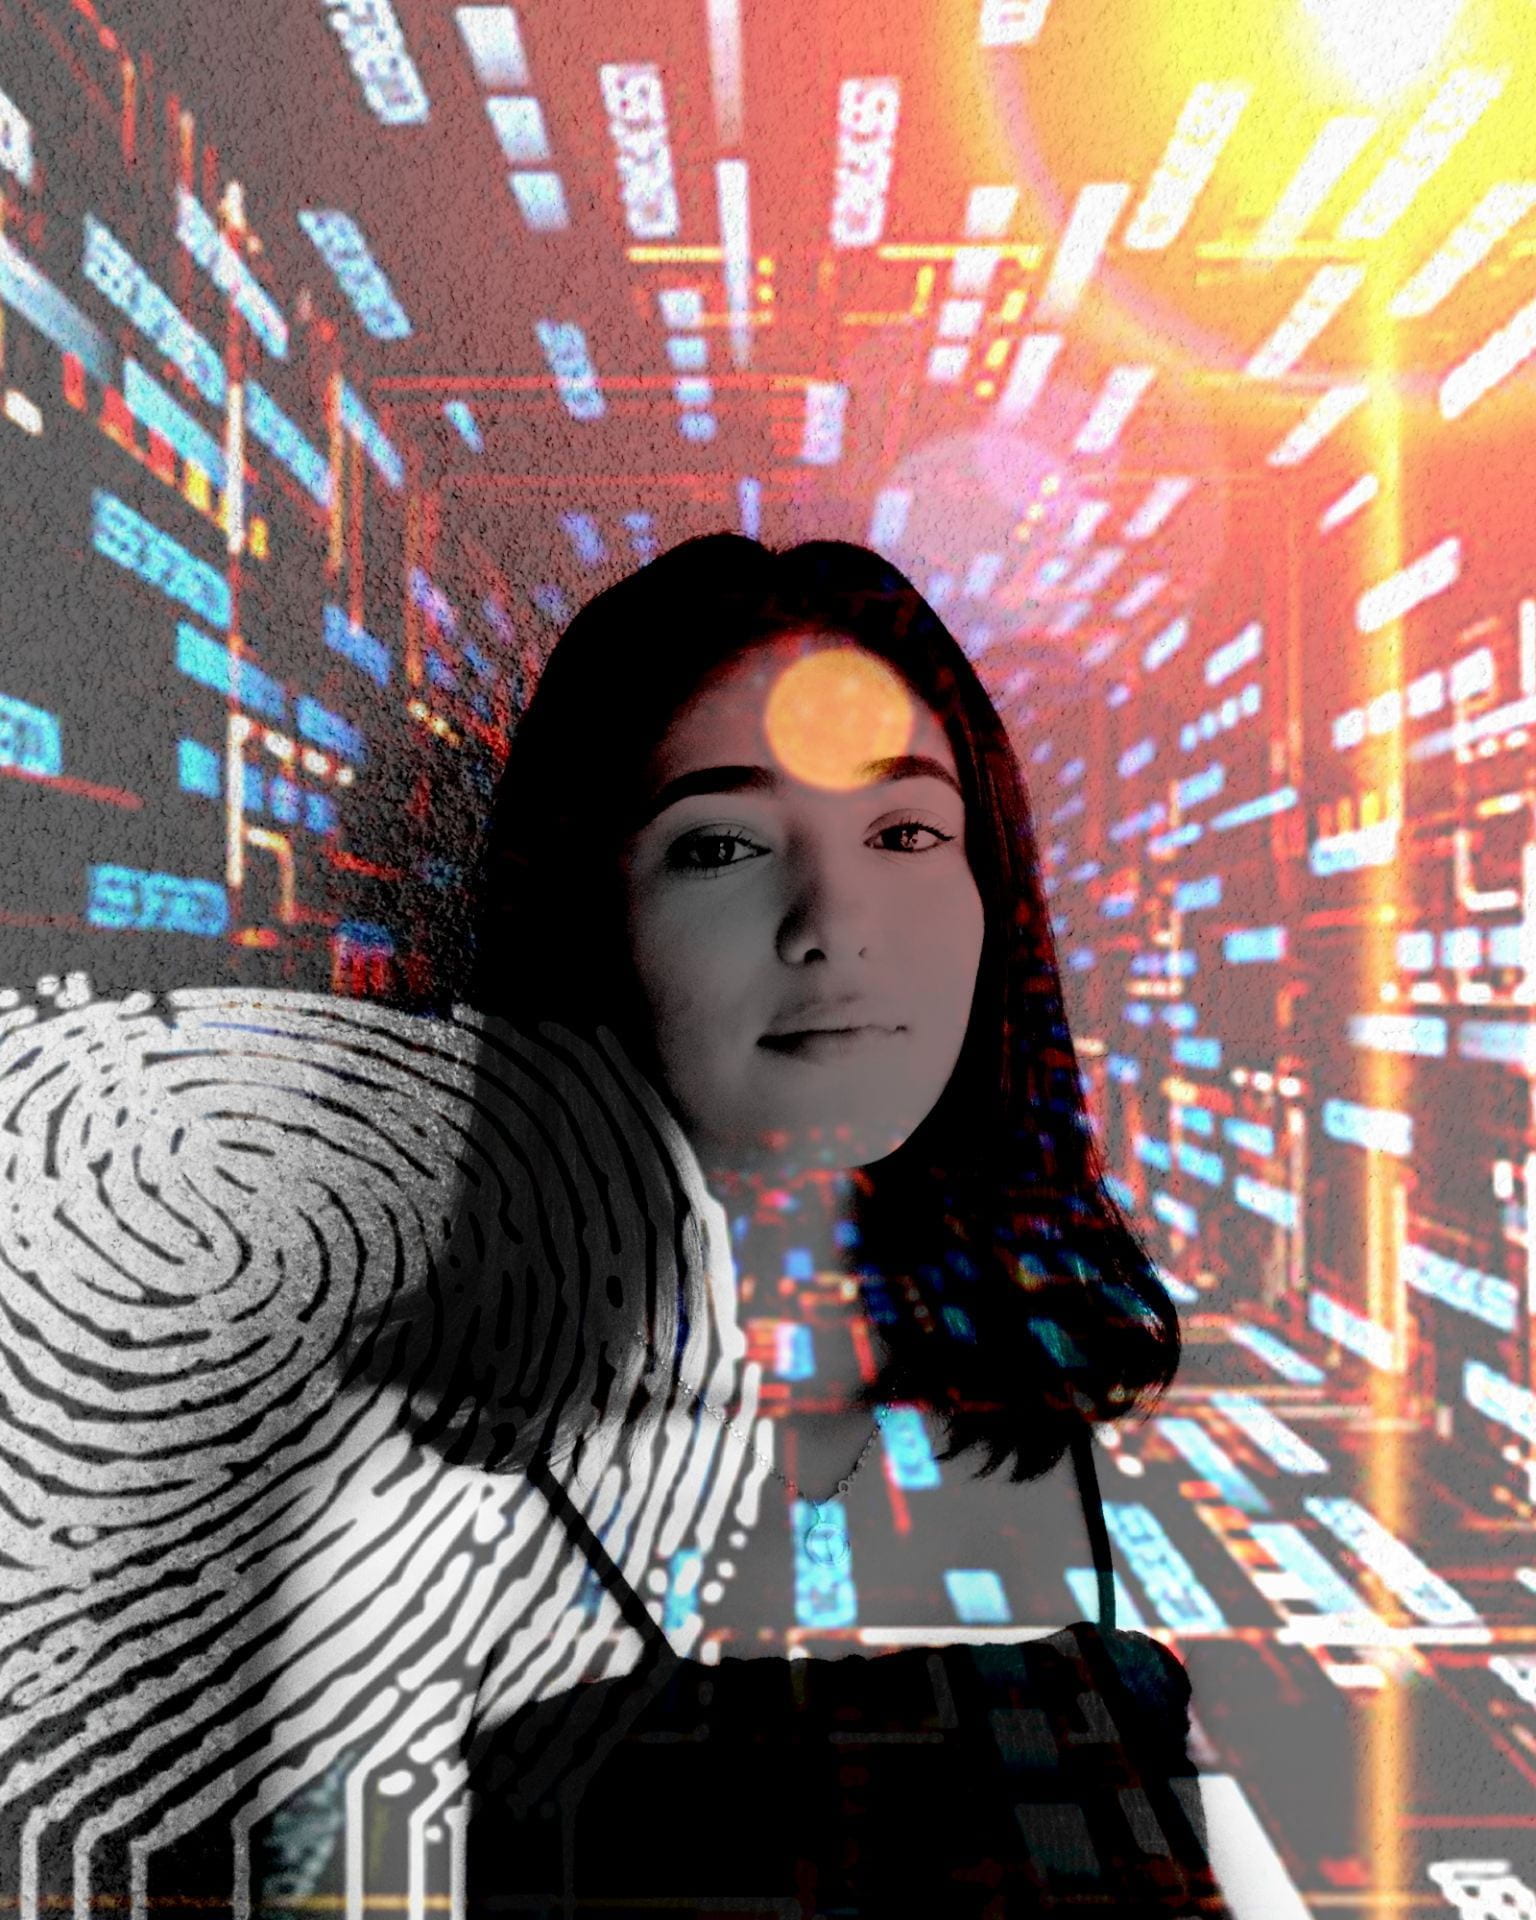
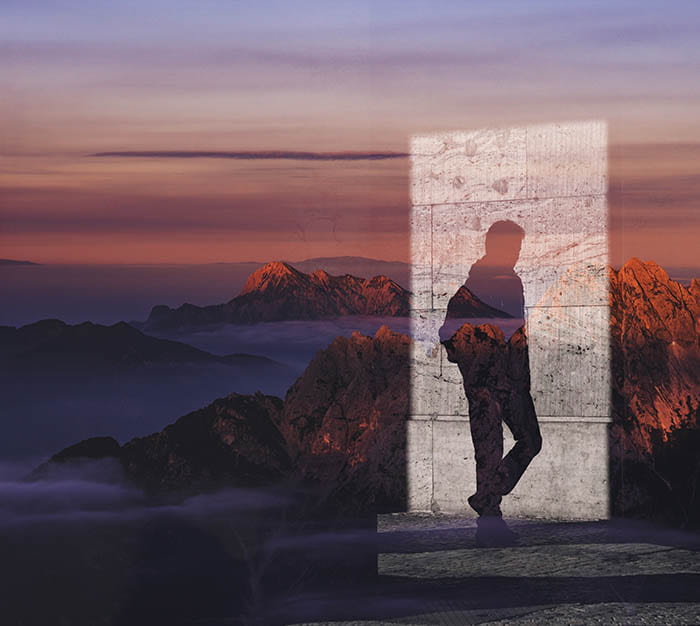
Double exposure photography is a technique that layers two different exposures on a single image, combining two photographs into one.

Double exposure creates a surreal feeling for your photos and the two photographs can work together to convey deep meaning or symbolism.

Take a look at some here: Double Exposure Online Examples

Double Exposure Portrait Tutorial Videos:

*Don’t have Snapseed or access to a phone right now?  Head to the bottom of this post for a tutorial using Photopea.com on your laptop instead!

Step 1: Have a portrait of yourself and a landscape/scenery photo ready. (If you don’t have a portrait of yourself yet, you can practice with a portrait of someone else, even from the Internet.)

Step 2: Make your portrait black and white with high contrast (bright whites & dark blacks). You can use Tools and/or Black and White filters (see video).


Click Here to View Double Exposure Tutorial Steps 3-5

Step 3: Tap on Double Exposure to add your scene.  Choose a double exposure style (also called blending modes) and adjust opacity to your liking. Click checkmark when done. Most common blending modes for this project will be “darken” and “lighten”, but feel free to try them all!

Step 4: If necessary, tap on the stacks with the arrow on the top right, select view edits.  Tap on double exposure and the brush icon.  Brush on the scenery onto your portrait (see video). Click checkmark when done, then back button.

Step 5: Feel free to experiment with more tools and filters! Have some fun with it and export when you’re satisfied. You can always export a few versions of it too!


Double Exposure Portrait using Photopea.com

For those without a phone or without Snapseed ONLY

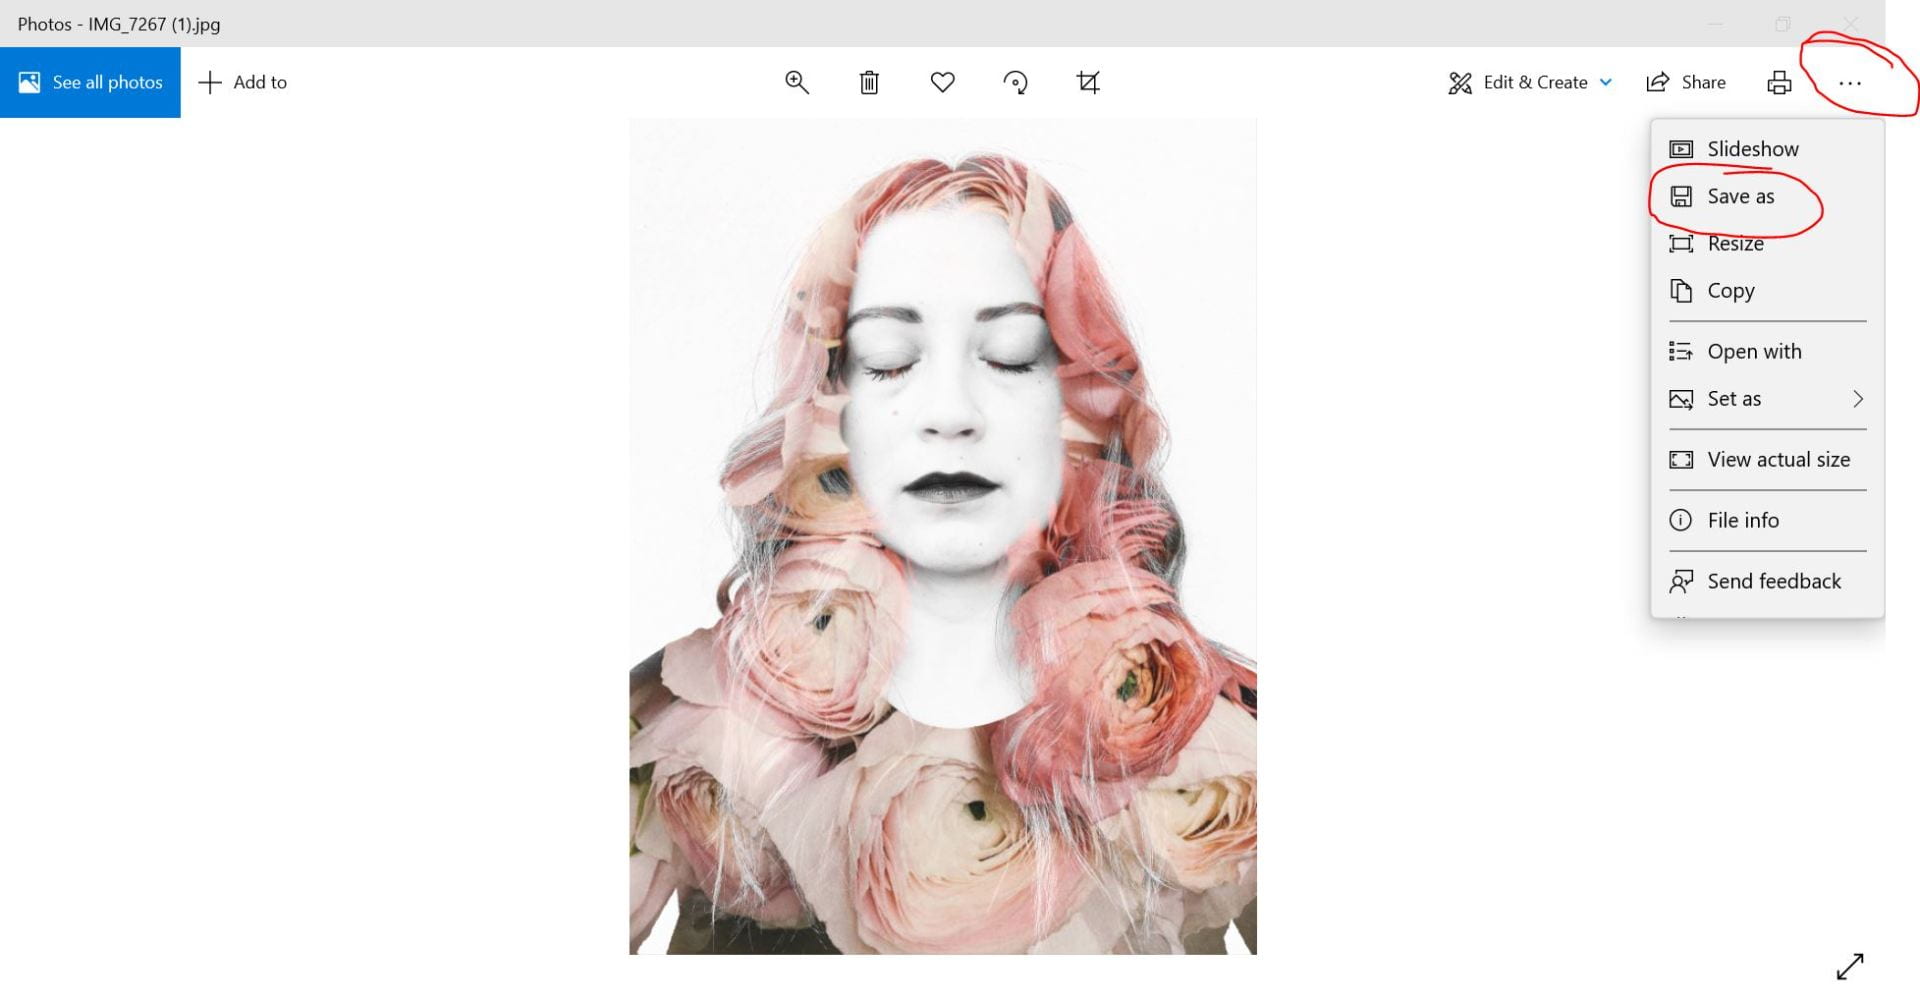
Note: I was cut off at the end. Here’s an image to show you how to save the exported JPG to your laptop: