Depth of Field Photo Assignment: From Shallow to Great!
Today’s Agenda:
- Publish and turn in yesterday’s Aperture & Depth of Field blog post. (Must be completed before you can move on to the photo-taking portion.)
- Complete the Photo Assignment below individually or with a partner.
Photo Assignment: Depth of Field using DSLR’s
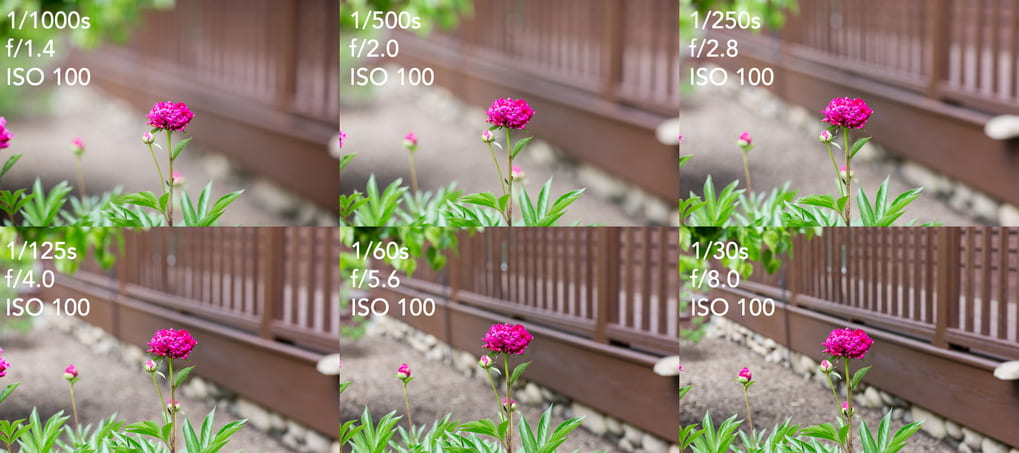
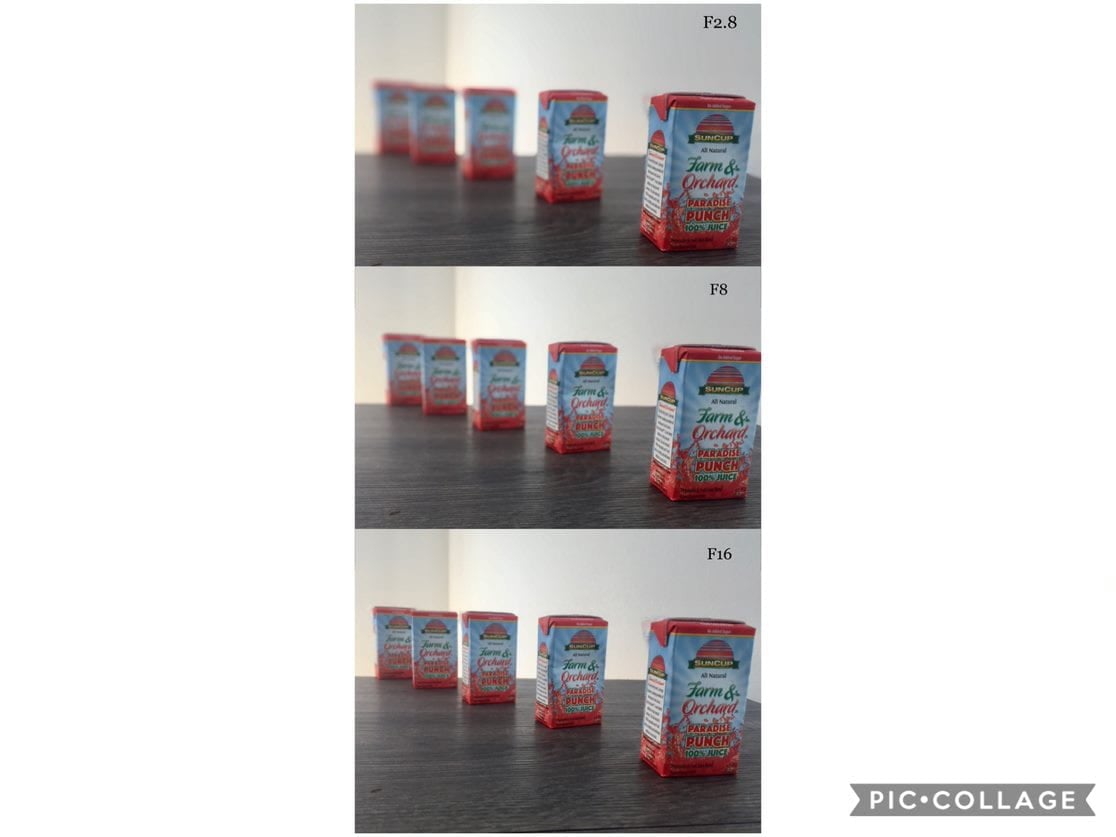
Objective: Observe the difference in depth of field when the SAME scene is captured with various aperture f-stops.
Equipment: DSLR camera, tripod, and maybe items to line up.
Instructions:
- Set your camera mode dial to “Av” (Aperture Priority) and your ISO to “AUTO”. Video showing camera settings
- Keep your lens completely zoomed out the whole time (18mm).
- Find a location with a vast background and set up a diagonal row of similar items/subjects with the first one placed at Rule of Thirds.
- Set up your camera and tripod as close as you can get while still maintaining focus of your first subject. You can switch to Manual Focus (MF) on the lens if necessary.
- Take a series of photos starting with f3.5 and increasing it one f-stop at a time up to f16. (It will be a total of 14 photos.)
- Upload all your photos to your OneDrive.
- Format the card when you put it back in the camera.
- Re-name your photo files in your OneDrive with their corresponding f-stop, otherwise you may not know which one is which when uploading as a batch on Edublogs. THIS IS IMPORTANT!!!
- Create a new post titled “From Shallow to Great! A Depth of Field Photo Demonstration”. Explain to your viewers what you had to do for this assignment then add your photos as a gallery with the shutter speed, f-stop, and ISO in the captions of each photo!