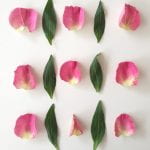
Monday 10/12/20: Meticulous Photography
Photographing meticulous arrangement of objects has long been used in creative media products. In this lesson you will learn how to create a meticulously arranged photograph of objects. These will look really cool in any media product you use them in such as on websites and magazines.
1.Watch the YouTube video here: https://youtu.be/oADIh9z7i8E to see real examples of this in magazine publications.
2.Before we take photographs I want you to spend some time looking at the work of four photographers:
Emily Blincoe: http://www.emilyblincoe.com/arrangements
Andy Goldsworthy: Google Image Search Results
Adam Hillman: https://mymodernmet.com/things-organized-neatly-adam-hillman/
(or do a Google Image search of Adam Hillman)
Paul Delmont*: https://www.pauldelmont.com/7672960-tastemade-cookbook-copy-1
(*Paul Delmont is optional)
3.Choose one favorite photograph for each of the photographers and save them to your laptop. Insert photos into a Word Document or PowerPoint and address the following:
Write a short description explaining why you like each photo. Include a brief summary as to how that photographer uses camera angles and rules of composition for that photo. Finally, include a short paragraph comparing and contrasting all the photographers’ work/style (how are they similar and how are they different?).
4.In this next part of the lesson, you will learn how to take a similar photographs! You will turn in a total of 4 photographs in Teams “Meticulous Photography”.
- Watch the video below.
- Search your house for a variety of objects and items that can be used to create a meticulous arrangement.
- Find a suitable location to create your arrangement. It must be in a well lit area. Preferably outside or at least near a window. Don’t rely on your house lights! They appear bright, but they will take a dark grainy shot. Natural light from a window is best. Never take your photographs in the evening using interior lights. Wait until it is daytime and set up near a window. YOU MUST DO THIS OR YOUR PHOTOGRAPHS WILL LOOK AWFUL!
- Find a suitable background. This could be plain pillow case, large piece of paper or anything that is large enough with no pattern. White is best but actually dark background colors can also work really well. Some natural surfaces outside can also work.
- Set up your arrangement. Be meticulous! Use a ruler if you need to. It will pay off in the end if you put the effort into this stage.
- Take the photograph. Go as close as you can but make sure that your image is in focus before you take the shot. Take it again at least 5 times! Never rely on a single shot. Look at it on your phone. Is it too dark/blurred? Fix any problems and then take the shot again. Then take it again!
- Create at least 4 different arrangements to photograph. Edit your best shots of each arrangement using Snapseed.
- Place your 4 edited photos on a collage or submit separately. (Each photo should be of a different arrangement.)
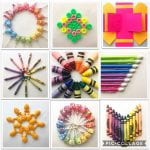
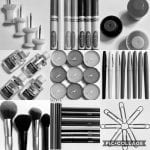
Student Examples:

