Thursday 10/27/22: Intro to Exposure and Camera Settings
Today’s Agenda:
- Intro to Exposure and Camera Settings!
- Experiment with camera simulator
We will cover the information on this link: Learn | Canon Explains Exposure (canonoutsideofauto.ca)
Extra links w aperture and depth of field definitions/explanations:
https://photographylife.com/what-is-depth-of-field
https://digital-photography-school.com/seeing-in-depth-of-field-a-simple-understanding-of-aperture/
Then you will conduct an aperture experiment on this link:
Play | Canon Explains Exposure (canonoutsideofauto.ca)
Instructions for Aperture f-stop experiment:
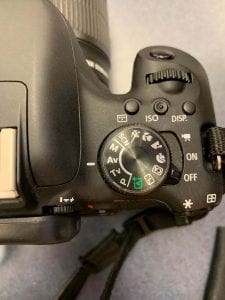
Step 1: Change the camera mode on the simulator to APERTURE PRIORITY (Av). THIS IS VERY IMPORTANT!!!
Step 2: Set the aperture setting (f-stop) to the lowest number: 2.8. Press the blue shutter button to “take a picture”. Your picture will pop up for you to see. Read the info and then click “X”. This will save it in the gallery below.
Step 3: Now take another photo with each of the aperture settings: 4, 5.6, 8, 11, 16, and 22. You should then have a total of 7 photos saved in your gallery when you’re done.
Step 4: Analyze your photos in your gallery. Click on the first one to notice what aperture setting it was taken with, then click the arrow to view the next photo. View them all to answer the following question:
- How did the different aperture settings affect the images you captured?
Step 5: Clear you photo gallery by deleting each one. Now change the camera mode back to MANUAL. Set the shutter speed to 1/60 and ISO to 400.
Step 6: Take photos using the same aperture f-stops (2.8, 4, 5.6, 8, 11, 16, 22)
Step 7: Analyze your photos again, paying attention to the aperture used in each one, and answer the following question:
- How did the different aperture settings affect the images you captured this time?


